Promoting your events on Facebook directly from the Hytix admin panel can help you engage with your audience and drive ticket sales. With the Facebook post functionality, you can share event details, ticket URLs, and more, allowing your followers to easily access your event and purchase tickets.
Here’s a step-by-step guide to help you create and manage Facebook posts from your Hytix admin account.
Step 1: Connect Your Facebook Account to Hytix
To begin, you'll need to connect your Facebook account to Hytix so that you can create posts on your Facebook pages.
- Navigate to the Integration Settings
Go to Settings > Integration in your Hytix admin panel. - Connect Your Facebook Account
Scroll to the bottom of the page, where you'll find the Facebook option. Click on the Connect button.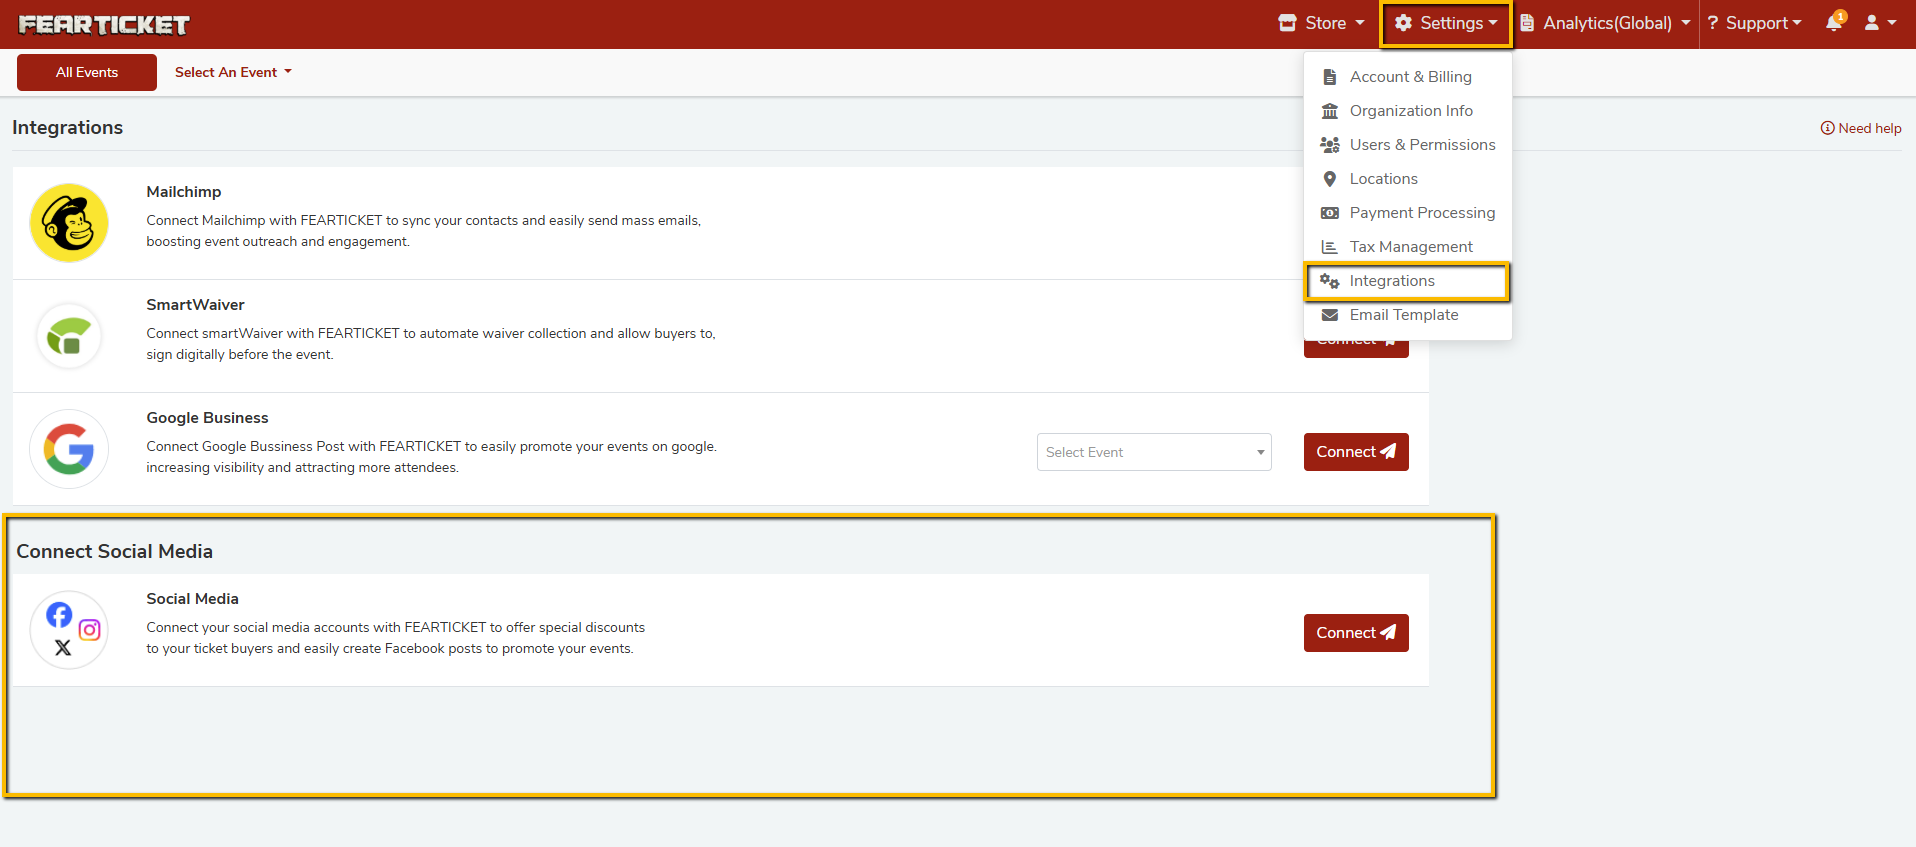
- Login to Facebook
A Facebook login page will appear. Log in to your Facebook account.
- Grant Access to Your Facebook Pages
After logging in, Facebook will prompt you to grant Hytix access to your Facebook pages. You’ll be presented with two options:- Option 1: Opt in to all current and future pages.
- Option 2: Opt in to current pages only.
We recommend selecting Option 1 to ensure all current and future pages you create on Facebook are automatically linked to your Hytix account.
- Save the Settings
After selecting your preferred option, click Continue, review the permissions, and click Save to confirm.
Once your account is successfully connected, you will see a success message, and you can click Got It to proceed.

Step 2: Create a Facebook Post for Your Event
After connecting your Facebook account, you can now create posts for your events. Follow these steps:
- Select an Event
From the Hytix admin, you can choose the live ongoing event for which you want to create a Facebook post. - Create the Post
Click on the Create Post button. You will be redirected to the Create Facebook Post page for your selected event, where you can complete the post details. - Fill Out the Post Form
- Select the Facebook Page: Choose the page where you’d like to publish the post.
- Enter the Post Description: Write a compelling description to promote your event.
- Upload the Image: Select an image (1220px x 630px, under 2MB, in JPEG, PNG, or JPG format).
- Add the Image Title: Typically, the event name is used as the title.
- Image Caption: Provide a caption for the image.
- Select the Country: Choose the country where you’d like the post to be visible.
- Choose the Posting Option
You have two options for publishing your post:- Create Facebook Post: This will publish the post immediately to your selected Facebook page.
- Schedule Post: Choose this option if you’d like to schedule your post for a specific future date and time.
- Preview the Post
On the right side of the page, you'll see a live preview of your post as you fill out the form. - Publish or Schedule
Once you're satisfied with the post details, click either Create Facebook Post or Schedule Post to finalize.
Step 3: Manage Your Facebook Posts
Once your Facebook post is created, you can manage and track all your posts from the Hytix admin panel.
- View All Posts for an Event
Navigate to Marketing Hub > Facebook Post. Here, you’ll see a table listing all your posts for the selected event, including essential details such as the post description, the selected page, and post status. - Edit a Post
To edit an already published post, click on the edit icon under the Action column. - Copy Facebook Page URL
You can also copy the URL of your Facebook page by clicking on the link icon in the Facebook Page column.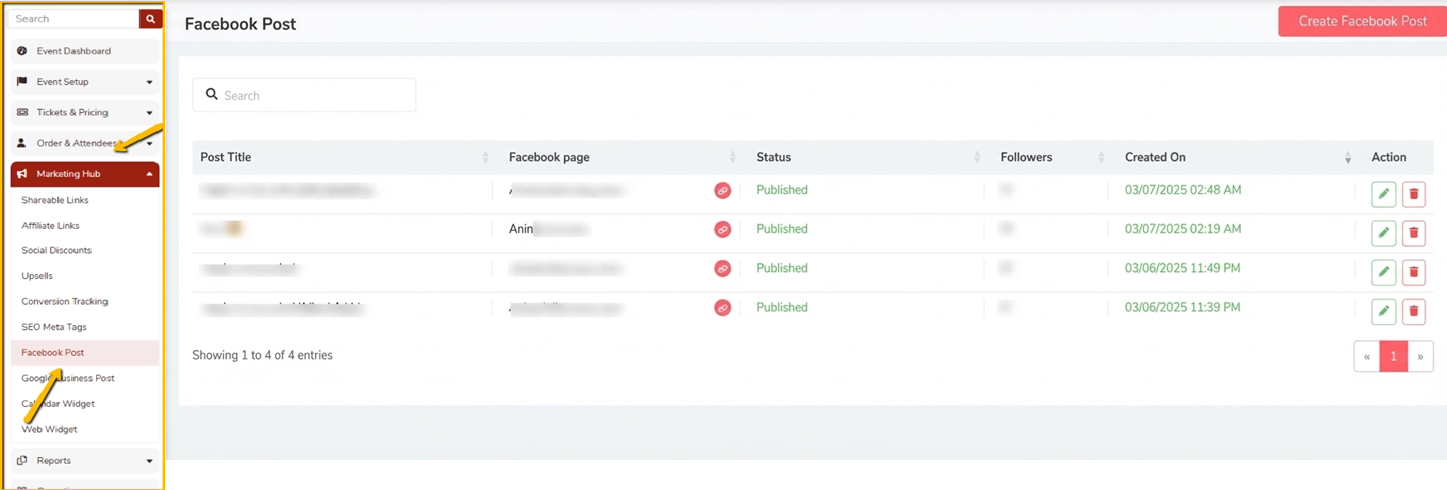
- View All Facebook Posts Across Your Account
To view all the Facebook posts for all your events across different pages, navigate to Settings > Integration > Facebook > View Posts. This will allow you to see a consolidated view of all posts.
Conclusion
Using the Facebook post functionality from the Hytix admin panel makes it easy to promote your events on Facebook and increase ticket sales. By connecting your Facebook account, creating posts with engaging content, and managing those posts effectively, you can boost event visibility and reach a wider audience.
Was this article helpful?
That’s Great!
Thank you for your feedback
Sorry! We couldn't be helpful
Thank you for your feedback
Feedback sent
We appreciate your effort and will try to fix the article