How to Manage the Schedule for an Existing Event in FEARTICKET
Step 1: Open Your Event
- Log in to your FEARTICKET account.
- Click All Events from the top navigation.
- Select the event you want to manage.
Step 2: Navigate to Schedule
- In the left sidebar, go to Manage Events.
- Click on Schedule under the dropdown.

Step 3: Add a New Schedule
- Click the + Add Schedule button (top right corner).
- Choose one of two schedule types:
- Date Range Schedule
- Time Ticket Scheduling
 What schedule types are available?
FEARTICKET offers two schedule types :
| Schedule Type | Best For | Custom Pricing per Slot |
|---|---|---|
| Time-Ticketing Schedule | Events with multiple time slots on one or more days | ✅ Yes |
| Date-Range Schedule | Events that run across multiple days in a set date range | ❌ Not supported |
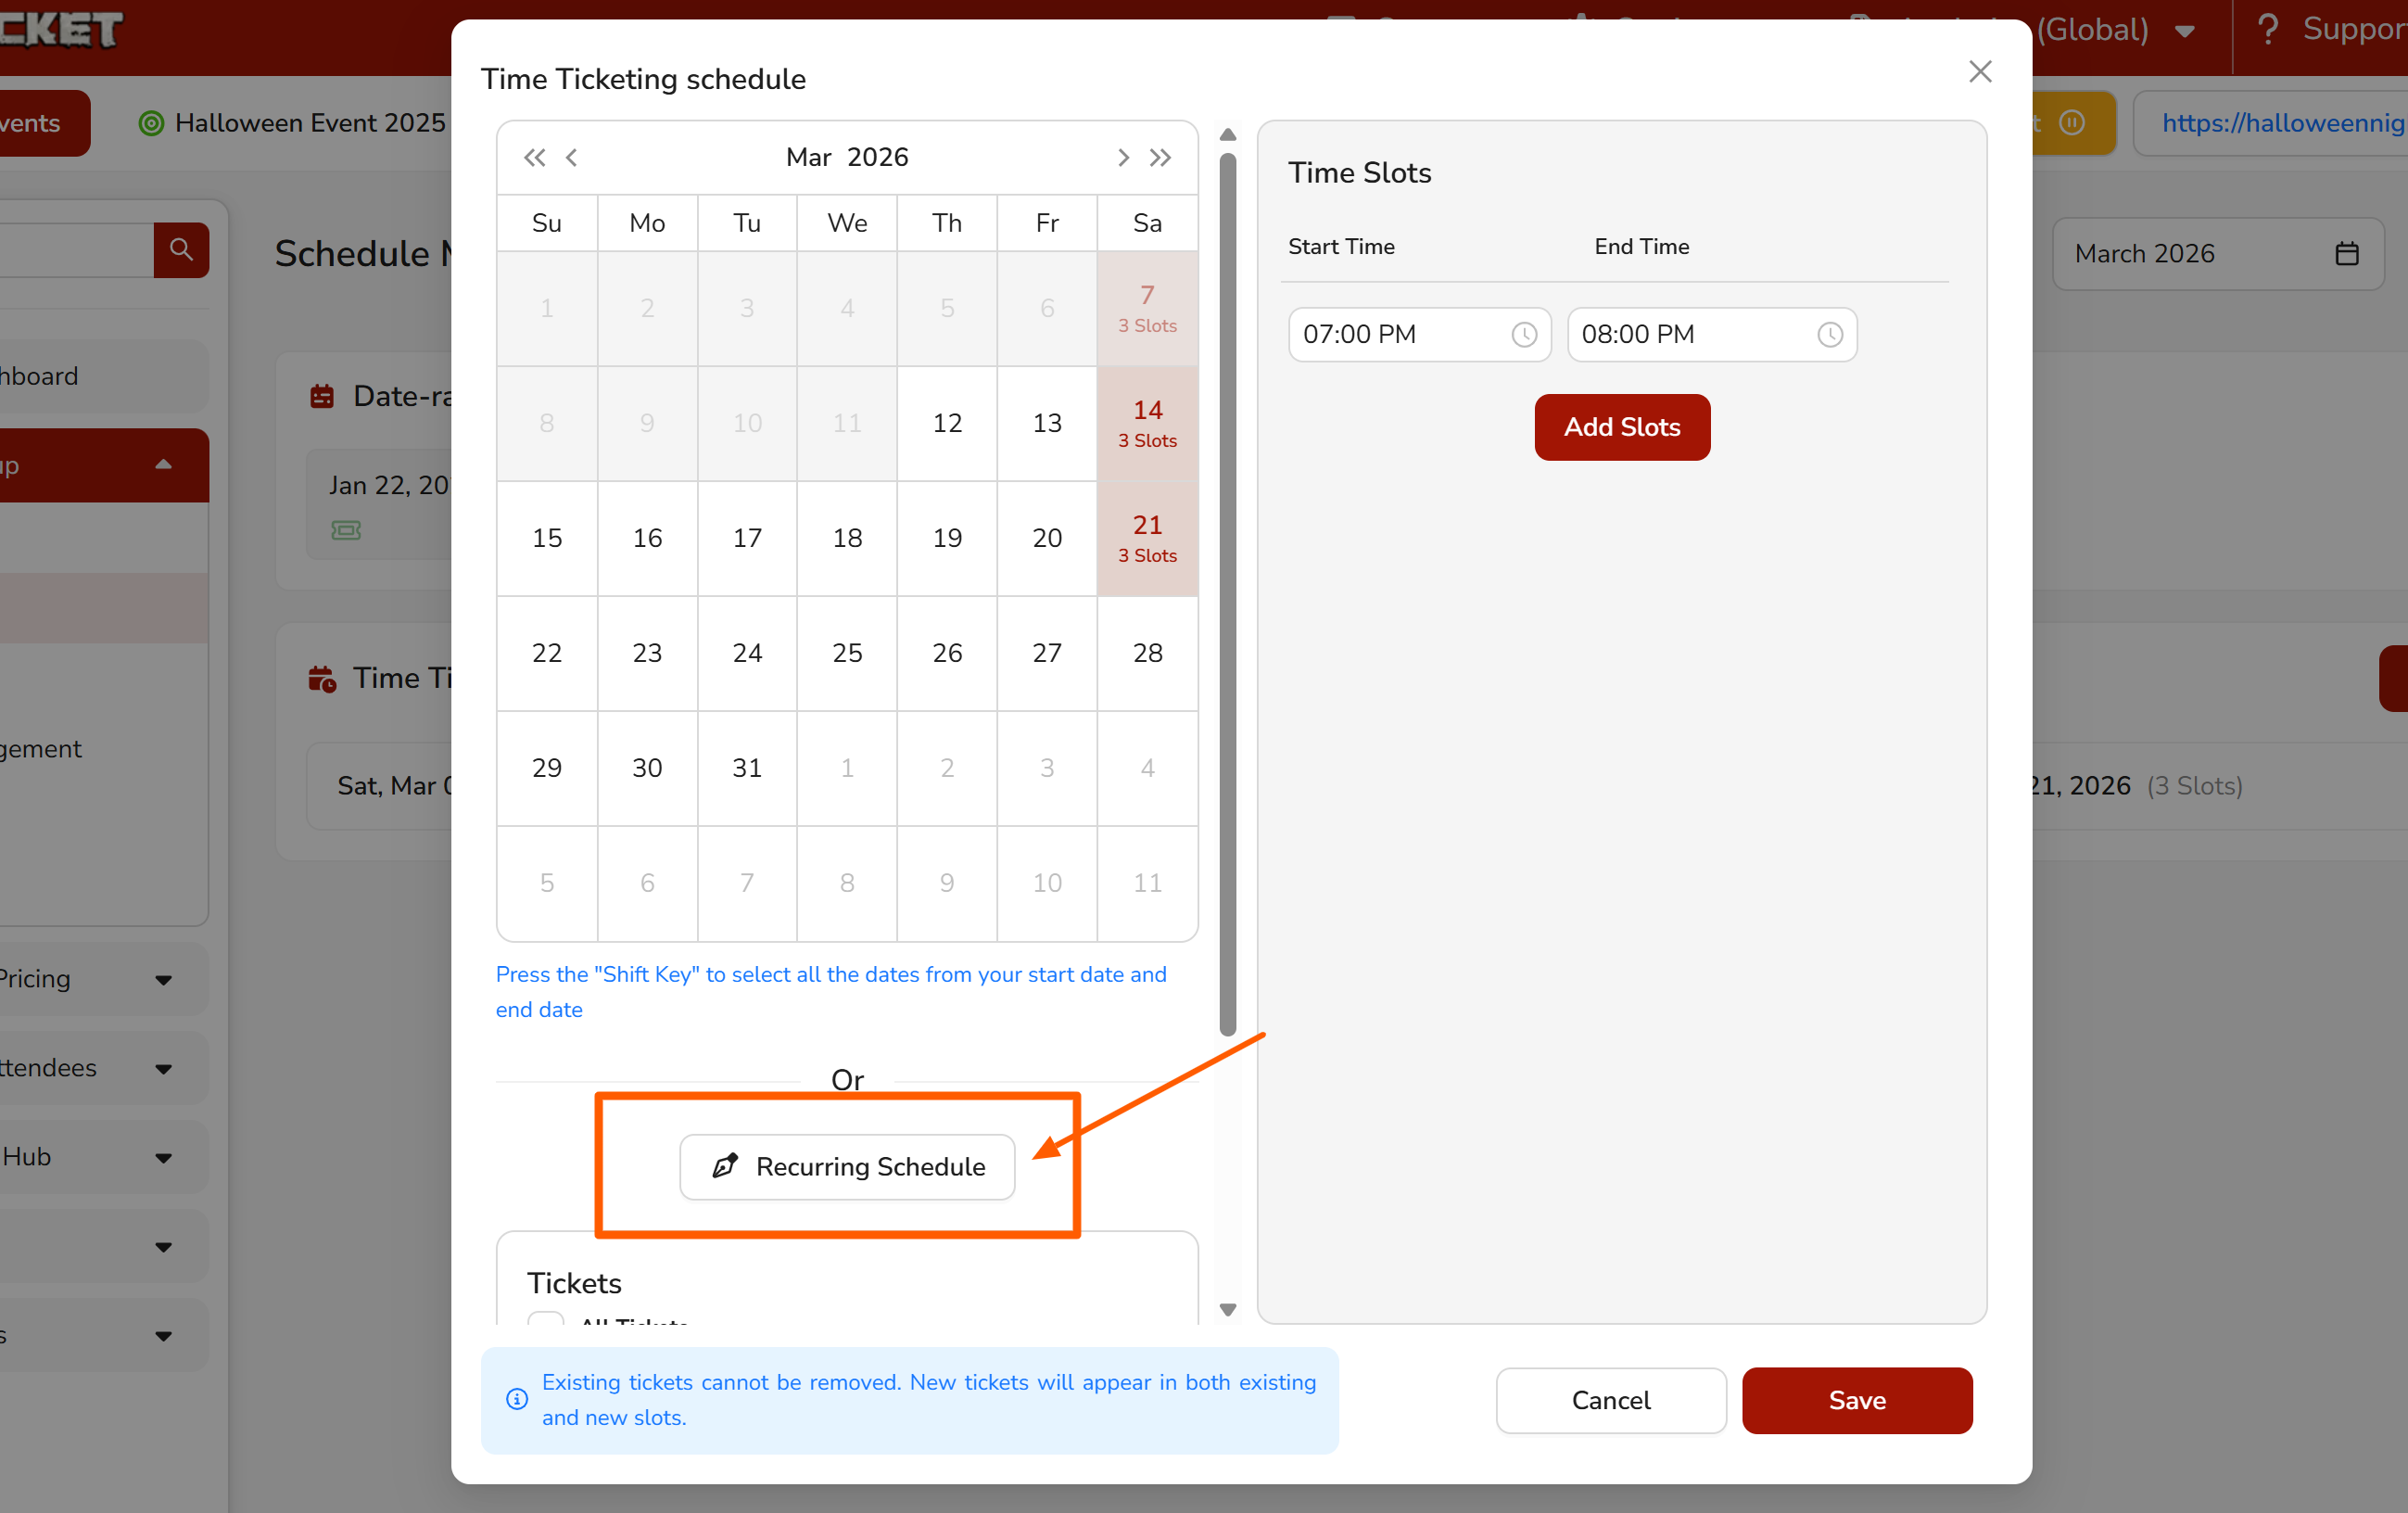
What is a Time-Ticketing Schedule?
Time-Ticketing Schedule is ideal for events with multiple time slots on one or more days. Ticket buyers can select their preferred date and time, and tickets are valid only for the chosen slot.
Key feature: You can customize prices and quantities for each individual slot.
How to set it up:
- On the Schedules step, select Time-Ticketing Schedule.
- Click Next Step.
- On the schedule detail screen, use the calendar to select your event dates.
- Hold Shift to select all dates between a start and end date.
- Under Time Slots, enter a Start Time and End Time.
- Click Add Slots to add the time slot to the selected dates.
- Repeat to add multiple time slots if needed.
You can also set up a Recurring Schedule by clicking the "Recurring Schedule" button at the bottom of the screen.
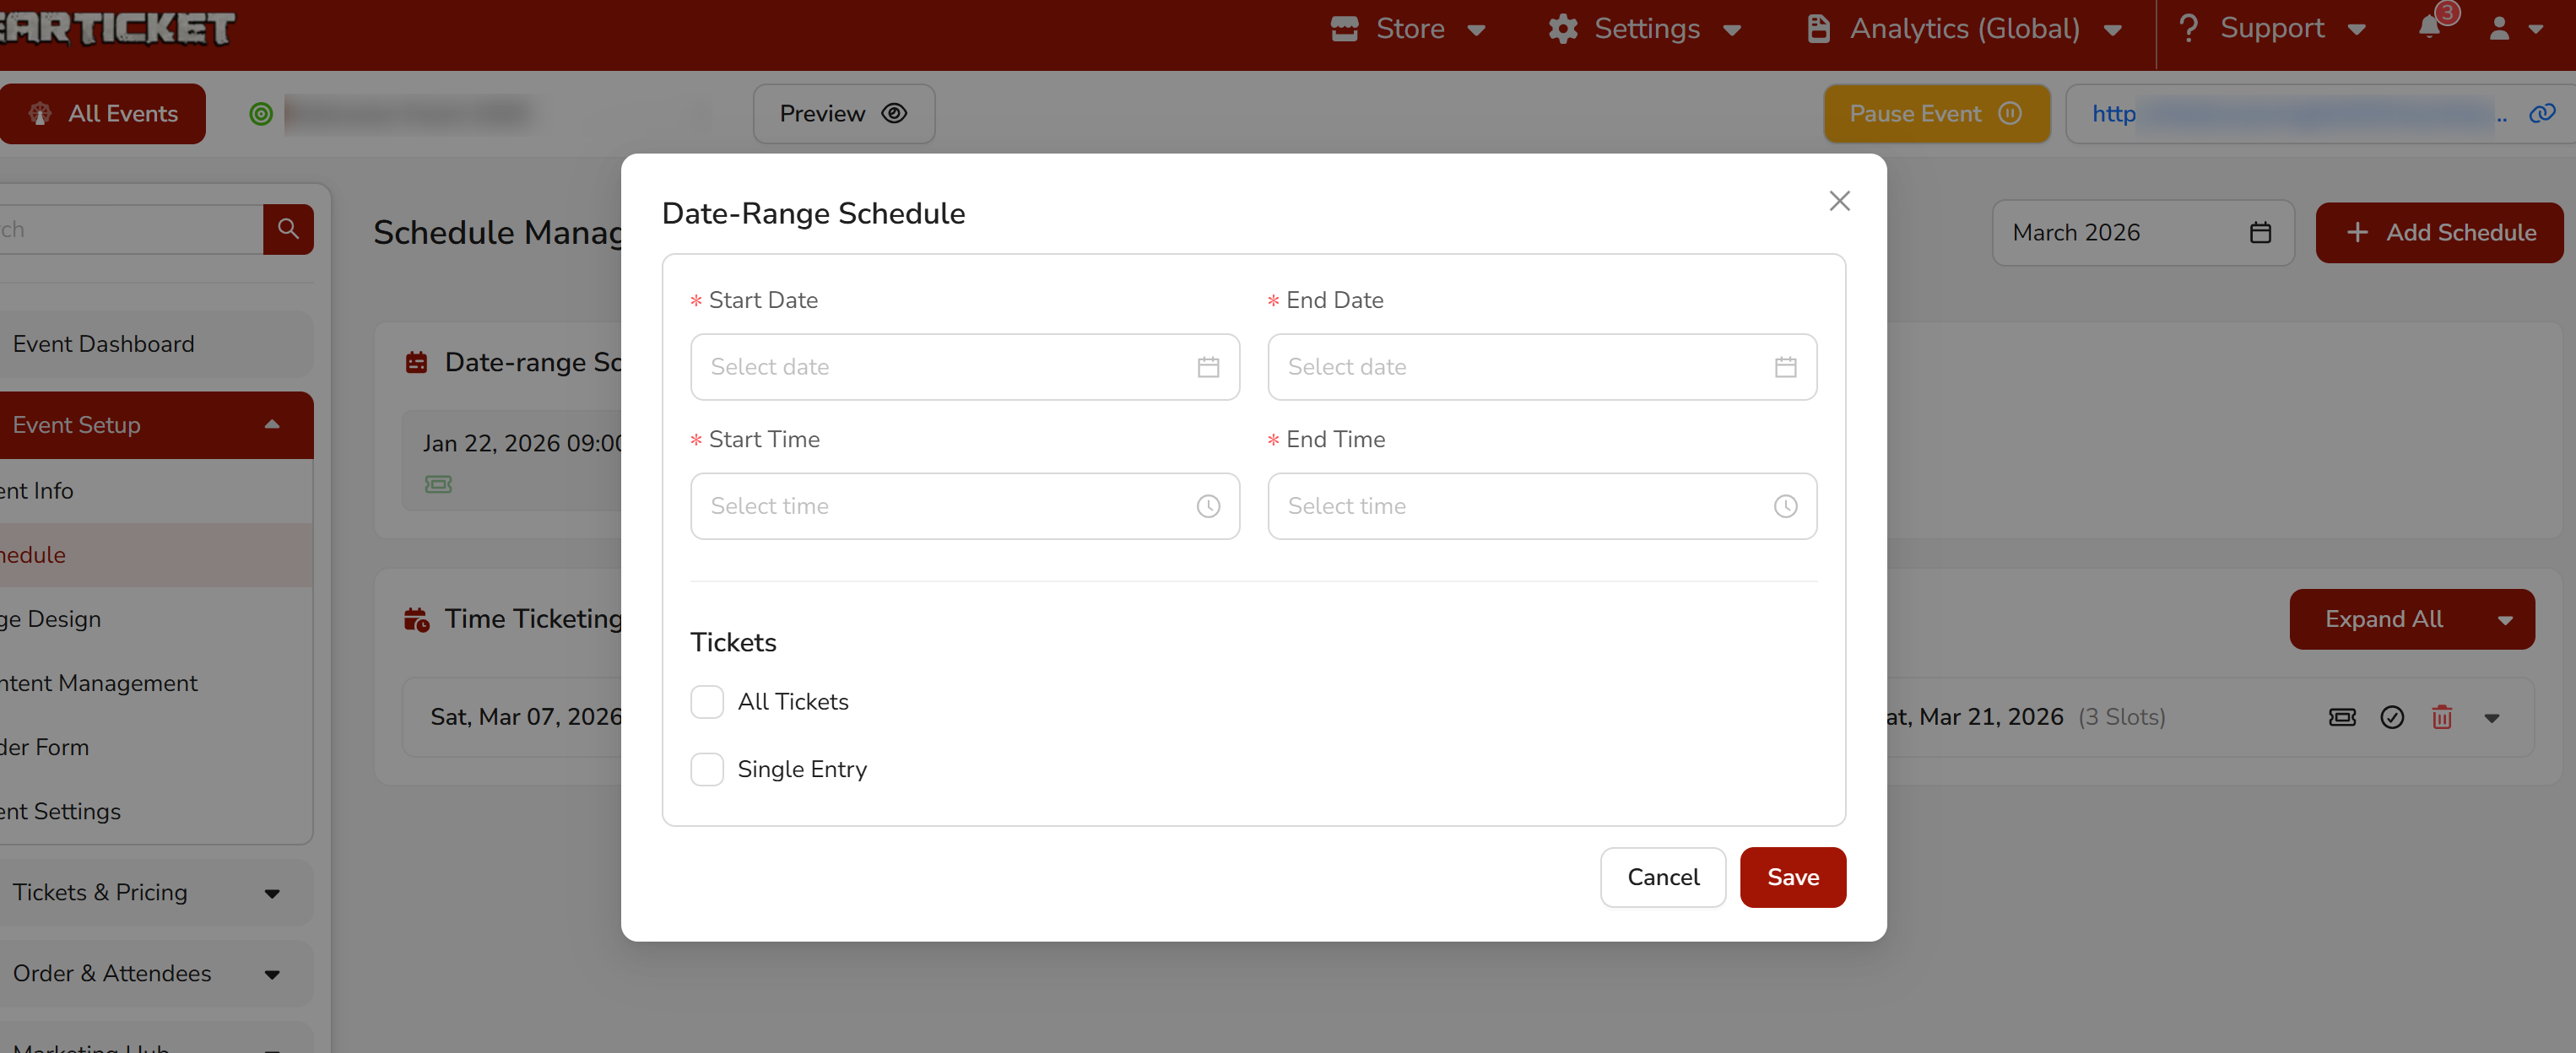
 What is a Date-Range Schedule?
Date-Range Schedule is designed for events that take place over multiple days within a set date range. Ticket buyers can attend on any day or time within the specified period.
Important limitation: Custom prices and quantities for specific dates are not supported with this schedule type.
How to set it up:
- On the Schedules step, select Date-Range Schedule.
- Click Next Step.
- On the schedule detail screen, fill in:
- Start Date and Start Time
- End Date and End Time
- Click + Add Slot to add additional date ranges if needed.
- Click Next Step to proceed to Tickets.
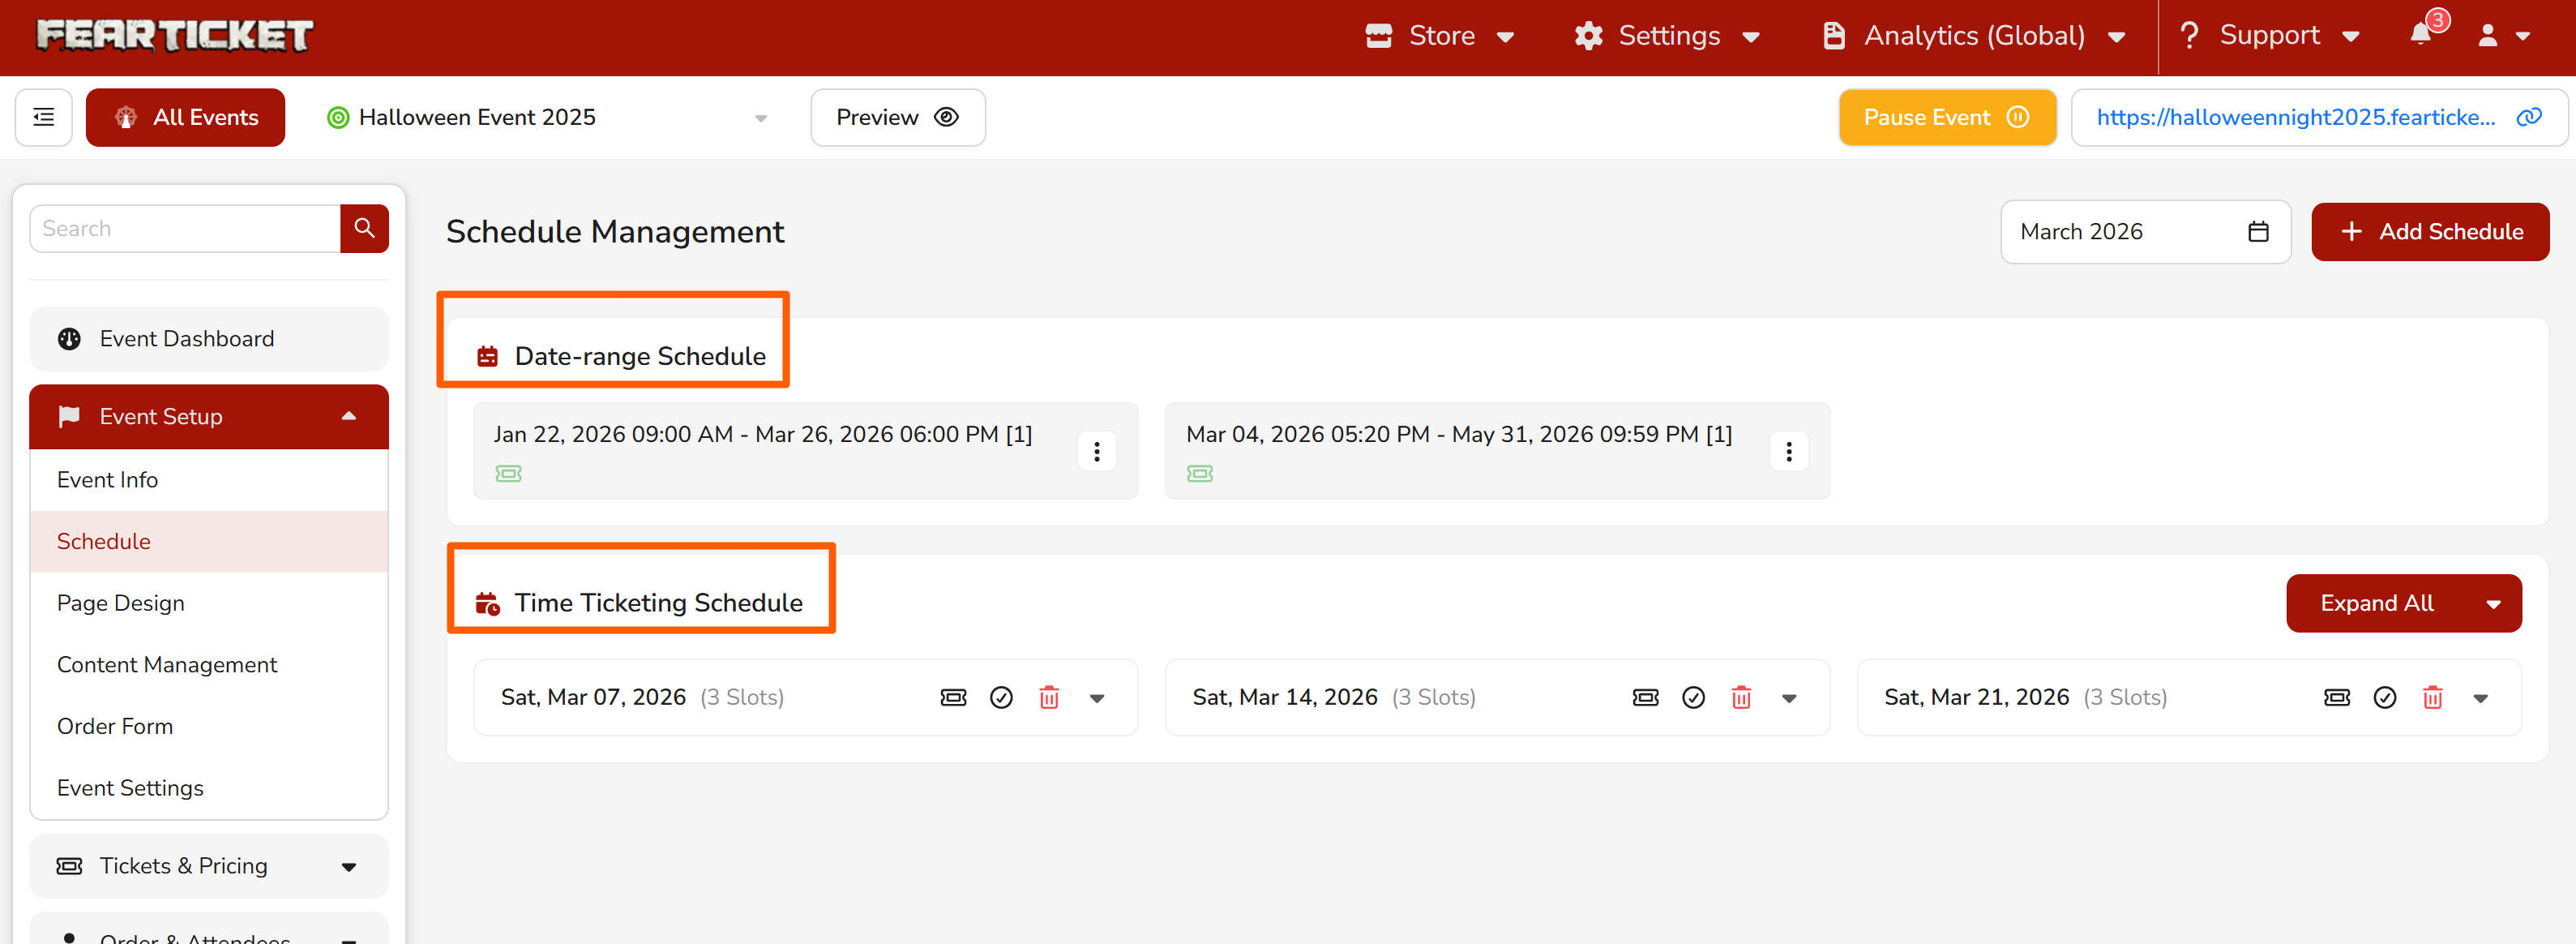
Can I select both Time-Ticketing and Date-Range schedules for the same event?
Yes. Both schedule types can be created in a single event for different ticket types. Once you finish creating schedule for Time-Ticketing, create schedule for Date-Range.
How do I navigate between Time-Ticketing and Date-Range schedule configuration?
After selecting both schedule types, the schedule configuration screen shows two tabs at the top:
- Time-Ticketing Schedule (Bottom)
- Date-Range Schedule (Top)
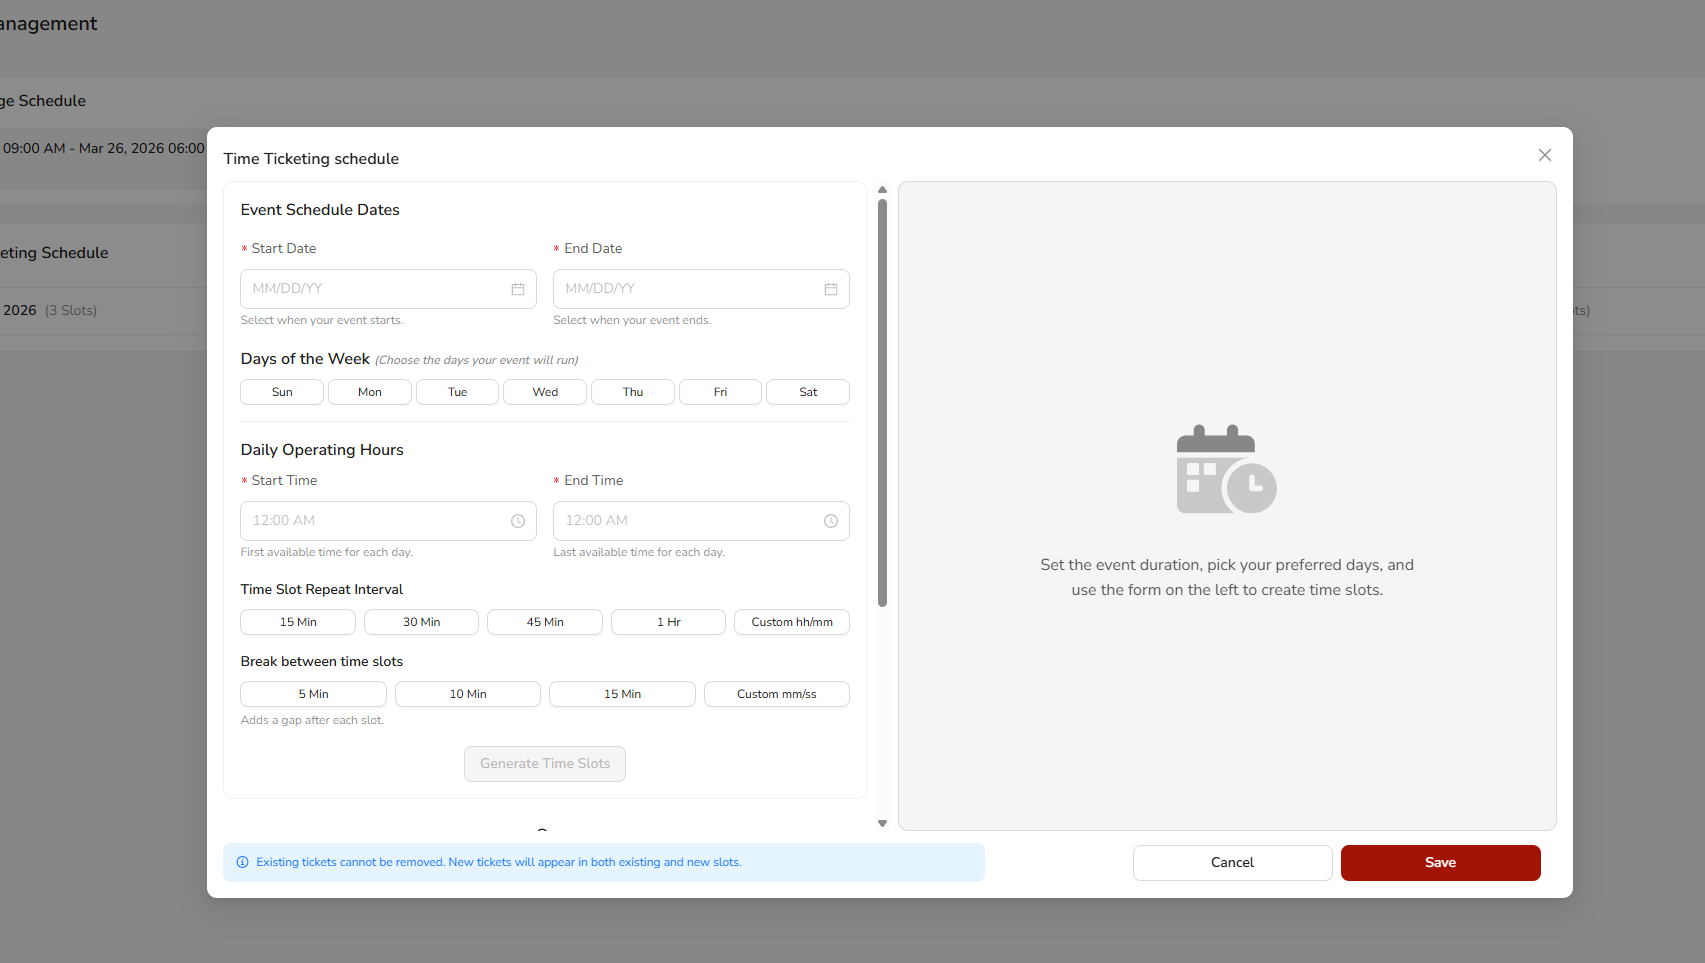
What does the Recurring Schedule option do?
The Recurring Schedule button (available within the Time-Ticketing Schedule setup) allows you to define a repeating pattern for your event for example, weekly classes or monthly meetups without having to manually select each individual date.
Was this article helpful?
That’s Great!
Thank you for your feedback
Sorry! We couldn't be helpful
Thank you for your feedback
Feedback sent
We appreciate your effort and will try to fix the article