FEARTICKET lets you add a small colored badge, called a promotional tag, to a ticket so it stands
out to buyers. You can label a ticket with something like EARLY BIRD, choose the color of the badge, and decide where it sits. It is useful for drawing attention to a deal, marking a limited or featured ticket, or simply making one option catch the eye on your event page.
In Tickets & Pricing, click on Rule Builder. Under the template list, find Promotional Tag and click Use this rule, as shown in the image below.
 The Promotional Tag template, found in the Rule Builder template list.
What Happens When You Open This Rule
Clicking Use this rule opens the rule builder on the Create New Rule screen. At the top you name the rule in the Rule Name field, which is required and holds up to one hundred characters, and next to it is a checkbox for Stop processing further rules if this matches. Below the name is the conditions area, already started with one condition for you. Beneath that is the Then do this area, where you choose the tag text, its color, its position, and the ticket it appears on. A live preview sits under everything and updates as you make your choices.
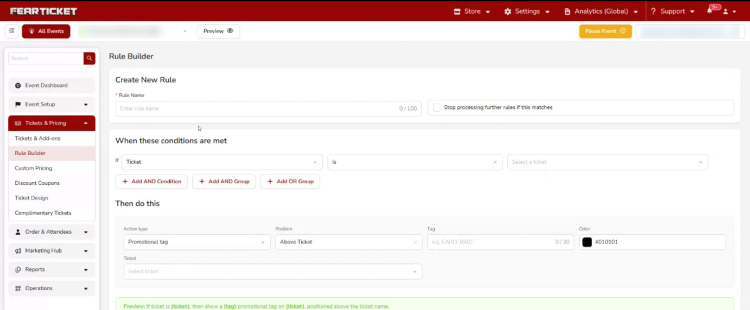 The rule builder screen that opens when you select Promotional Tag, with one condition started and the tag settings in the Then do this area.
Setting the Condition
The condition decides which ticket the tag applies to. The first field is set to Ticket. The second field is the operator, where Is matches a single ticket and Any Of lets you match more than one ticket at once. The third field is where you choose the ticket itself. For a simple tag on one ticket, leave the field on Ticket, leave the operator on Is, and pick your ticket.
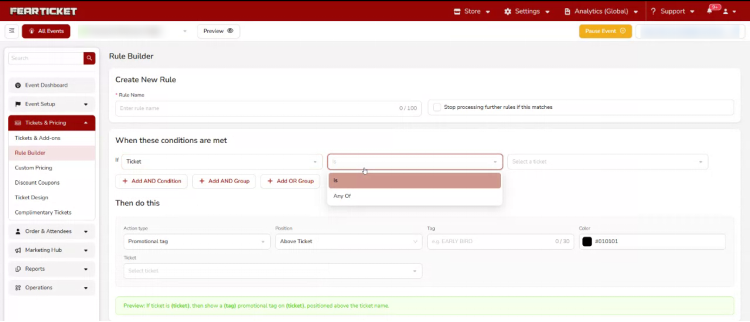 Setting the Ticket condition with the Is or Any Of operator.
Adding More Conditions (Optional)
If you want the tag to appear only in certain situations, you can change the field or add more. Clicking into the field dropdown shows the full list: Ticket, Purchase Date, Day of Week, Days Before Event, Ticket Quantity, Cart Quantity, Ticket Sold, and Ticket Sold (%). Each field brings its own operators, so numeric fields like Ticket Quantity use comparisons such as Greater than or Equal to, while Day of Week uses Is or Any Of.
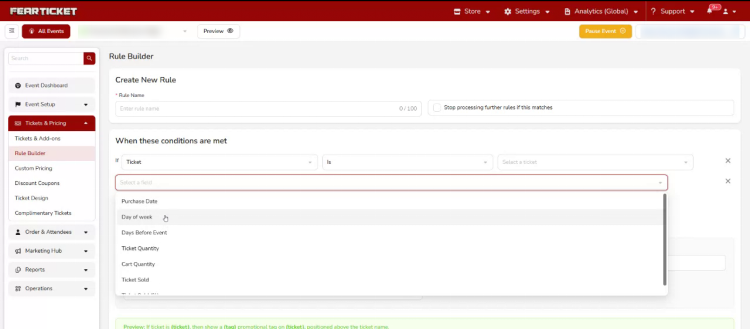 The full list of fields available when adding a condition.
You can also use Add AND Condition, Add AND Group, or Add OR Group to combine several conditions. An AND Condition or AND Group requires everything inside it to be true at the same time, while an OR Group gives the rule an alternate path, so the tag still shows if the OR Group is met even when the main condition is not. Each row and group has a small cross on the right to remove it.
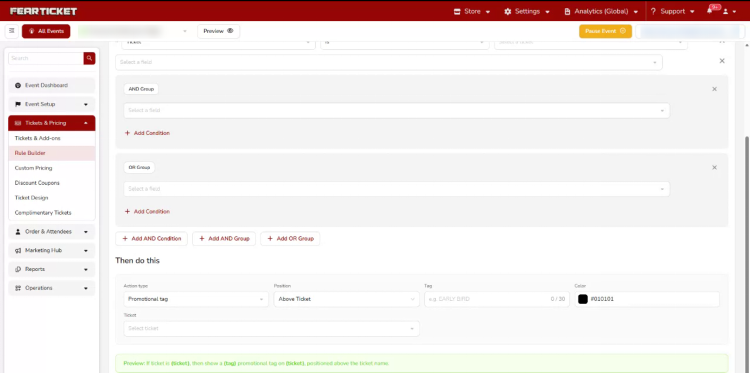 Adding AND Group and OR Group blocks to build a more advanced condition.
Setting the Action
The action lives under the Then do this heading. The first field is Action type, which is already set to Promotional tag. The second field is Position, which controls where the badge appears. After Price places it next to the price, Above Ticket places it over the ticket name, and Ribbon shows it as a corner ribbon on the ticket.
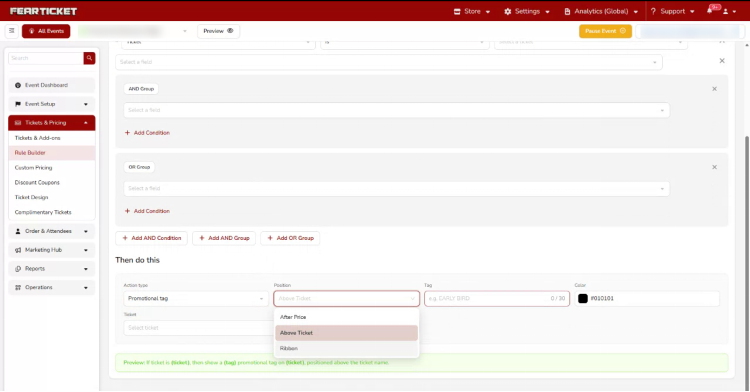 Choosing where the badge appears from the Position options.
Writing the Tag and Picking a Color
The Tag field is where you type the words that appear on the badge, such as EARLY BIRD, up to thirty characters. Next to it is the Color field. Clicking it opens a color picker where you can drag to choose a shade or type a hex code like #010101, which sets the badge color.
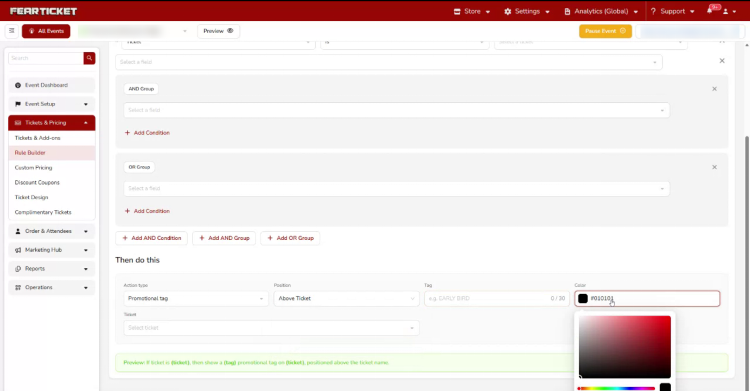 Entering the tag text and choosing the badge color.
Choosing the Ticket
The last field in the action is Ticket. Opening it shows every ticket for the event, such as General Admission, VIP Admission, Special Night, Season Pass, and your escape tickets. Pick the ticket that should carry the badge. This is the ticket buyers will see the tag on.
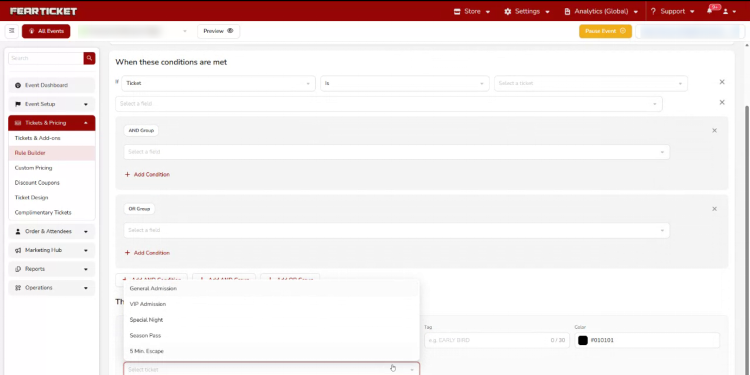 Selecting the ticket the tag will appear on.
Reading the Preview Before You Save
FEARTICKET writes a plain English summary of the rule right above the Save button, and it updates automatically as you change the tag, color, position, or ticket. For a basic setup it would read:
If ticket is (ticket), then show a (tag) promotional tag on (ticket), positioned above the ticket name.
It's worth reading this line before saving, since it's the easiest way to catch a mistake.
Example
Say you want to highlight General Admission as an early deal. You would name the rule something clear like Early Bird Tag, set the condition to Ticket Is General Admission, leave the Action type on Promotional tag, set the Position to Above Ticket, type EARLY BIRD in the Tag field, choose a color for the badge, and select General Admission as the ticket. Once saved, buyers browsing the event will see a colored EARLY BIRD badge on General Admission.
Note: A promotional tag only changes how the ticket looks to buyers. It does not change the price or block any purchase, so you can use it alongside other rules without affecting how tickets are sold.
Was this article helpful?
That’s Great!
Thank you for your feedback
Sorry! We couldn't be helpful
Thank you for your feedback
Feedback sent
We appreciate your effort and will try to fix the article