FEARTICKET · Order & Attendees
The Orders page gives you a complete view of every order placed for your event, whether it came through online sales or the box office. From here you can review order details, check payment status, and narrow the list down to exactly what you're looking for using the built-in filters.
Order & Attendees and click Orders.What you'll learn
- How to open and read the Orders list
- How to use the Filters panel to narrow your results
- What each filter option does
Opening the Orders page
- In the left navigation, click
Order & Attendeesto expand the section. - Click
Orders. The full order list for your selected event loads.
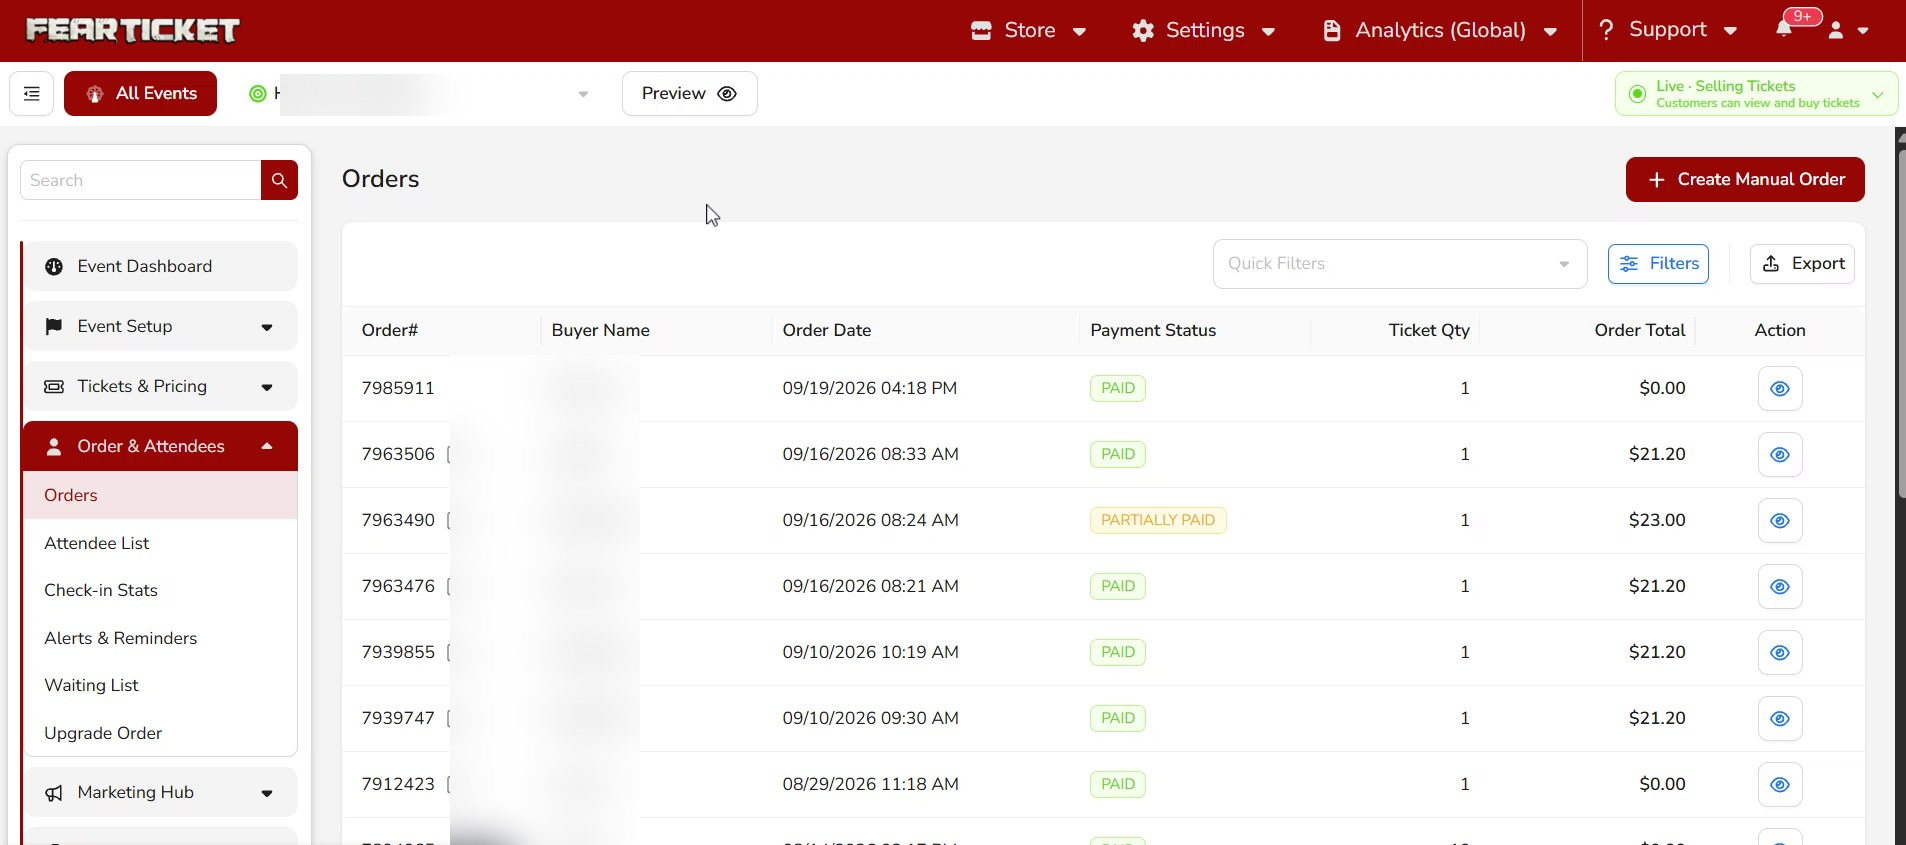
Every order row includes:
| Column | What it shows |
|---|---|
| Order# | The unique reference number for the order. |
| Buyer Name | The name of the person who placed the order, or the selling point (for example, box office). |
| Order Date | The date and time the order was created. |
| Payment Status | Whether the order is Paid, Partially Paid, and so on. |
| Ticket Qty | The number of tickets on the order. |
| Order Total | The total amount for the order. |
| Action | Click the view icon to open the full order details. |
Quick Filters for common views, Export to download the list, or Create Manual Order to add an order yourself.Filtering your orders
When you have a lot of orders, the Filters panel helps you find the ones you need fast.
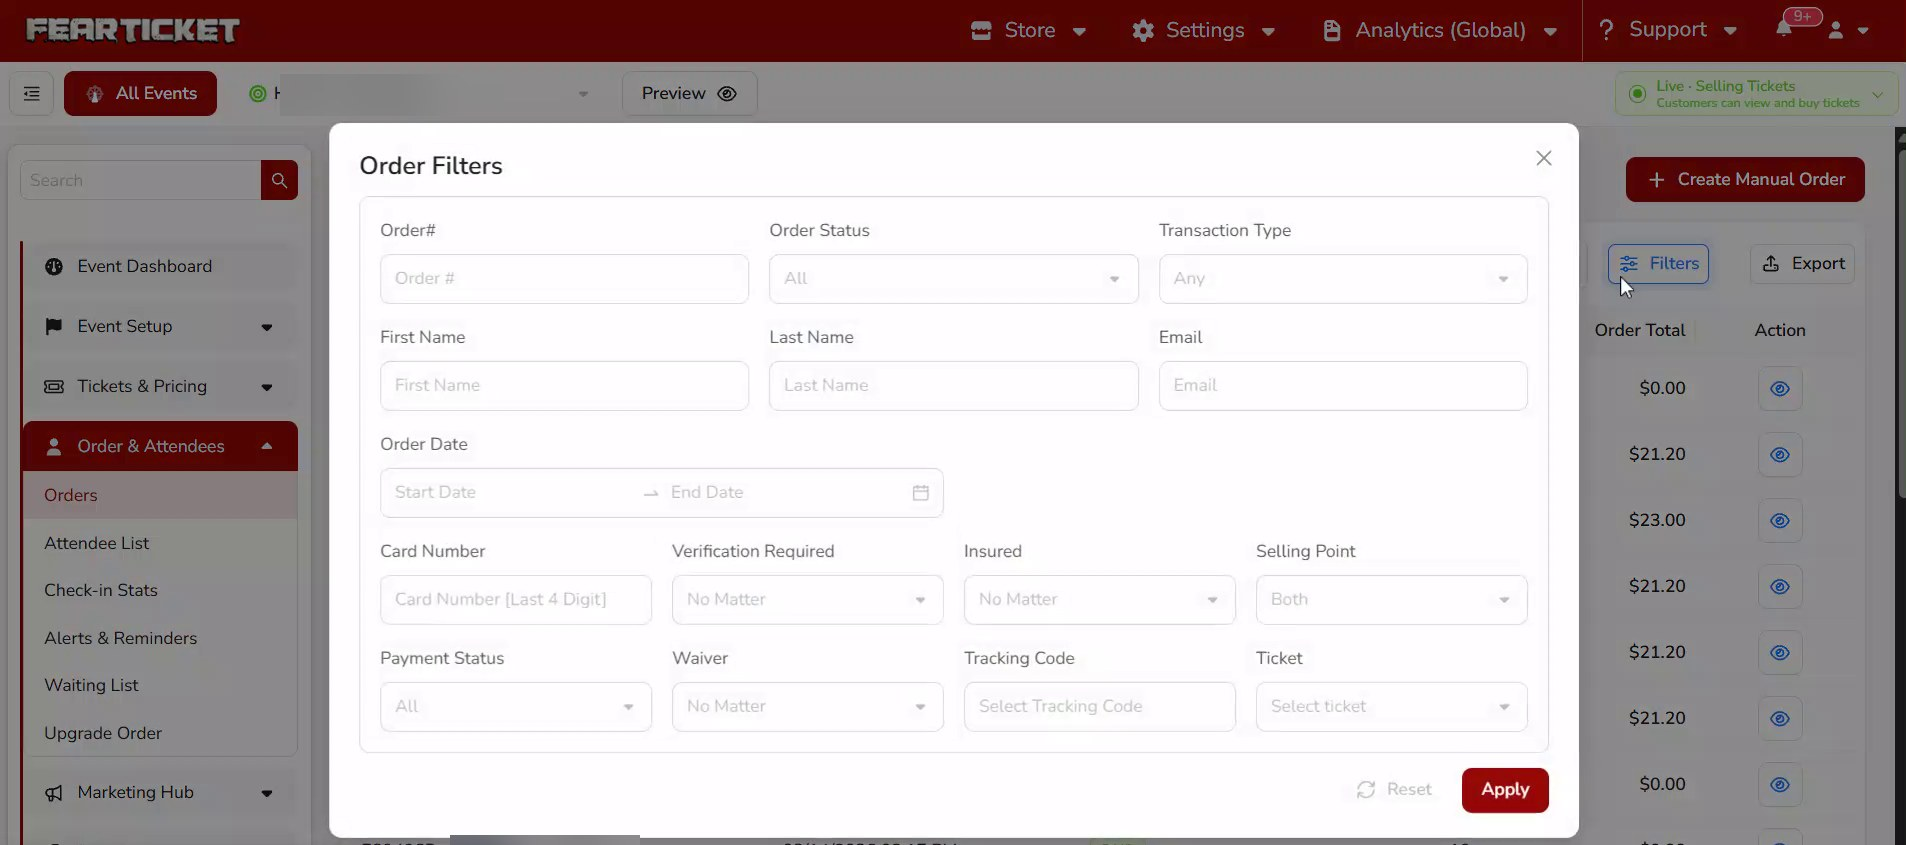
- On the Orders page, click
Filtersin the top right of the list. - The Order Filters panel opens with all available options.
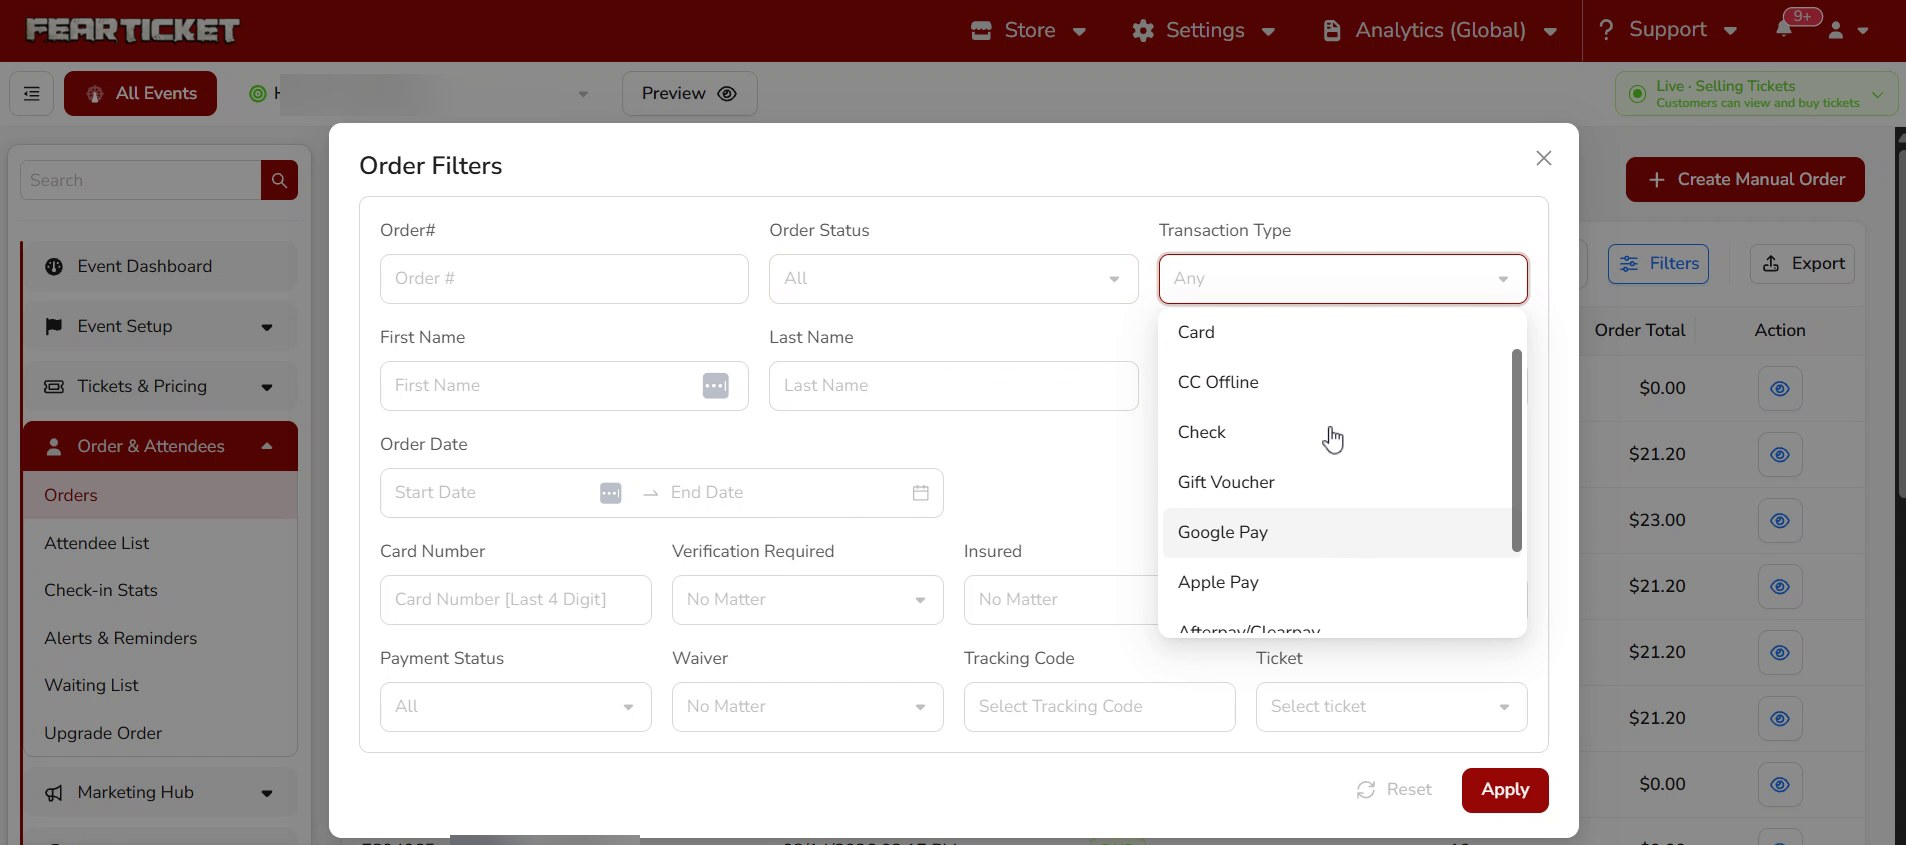
Filter by transaction type
Use the Transaction Type dropdown to show only orders paid a certain way, such as Card, CC Offline, Check, Gift Voucher, Google Pay, or Apple Pay.
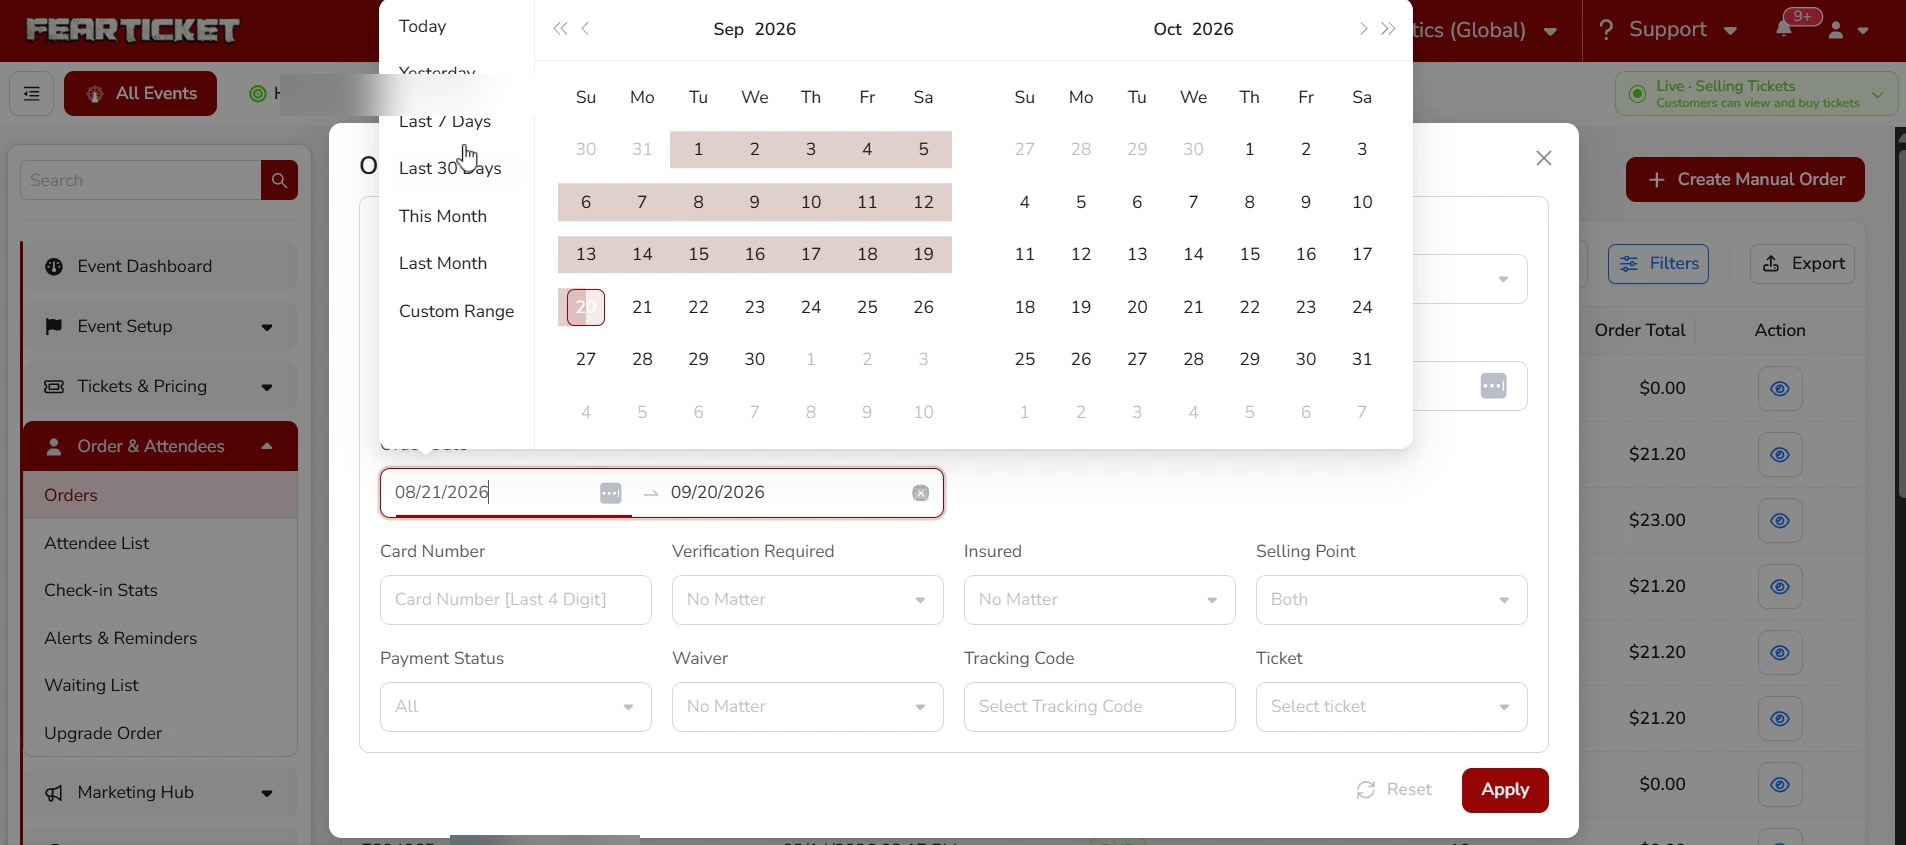
Filter by order date
Use the Order Date field to focus on a specific time frame. Pick a preset like Today, Yesterday, Last 7 Days, Last 30 Days, This Month, or Last Month, or choose Custom Range and select your own start and end dates.
Filter by payment status
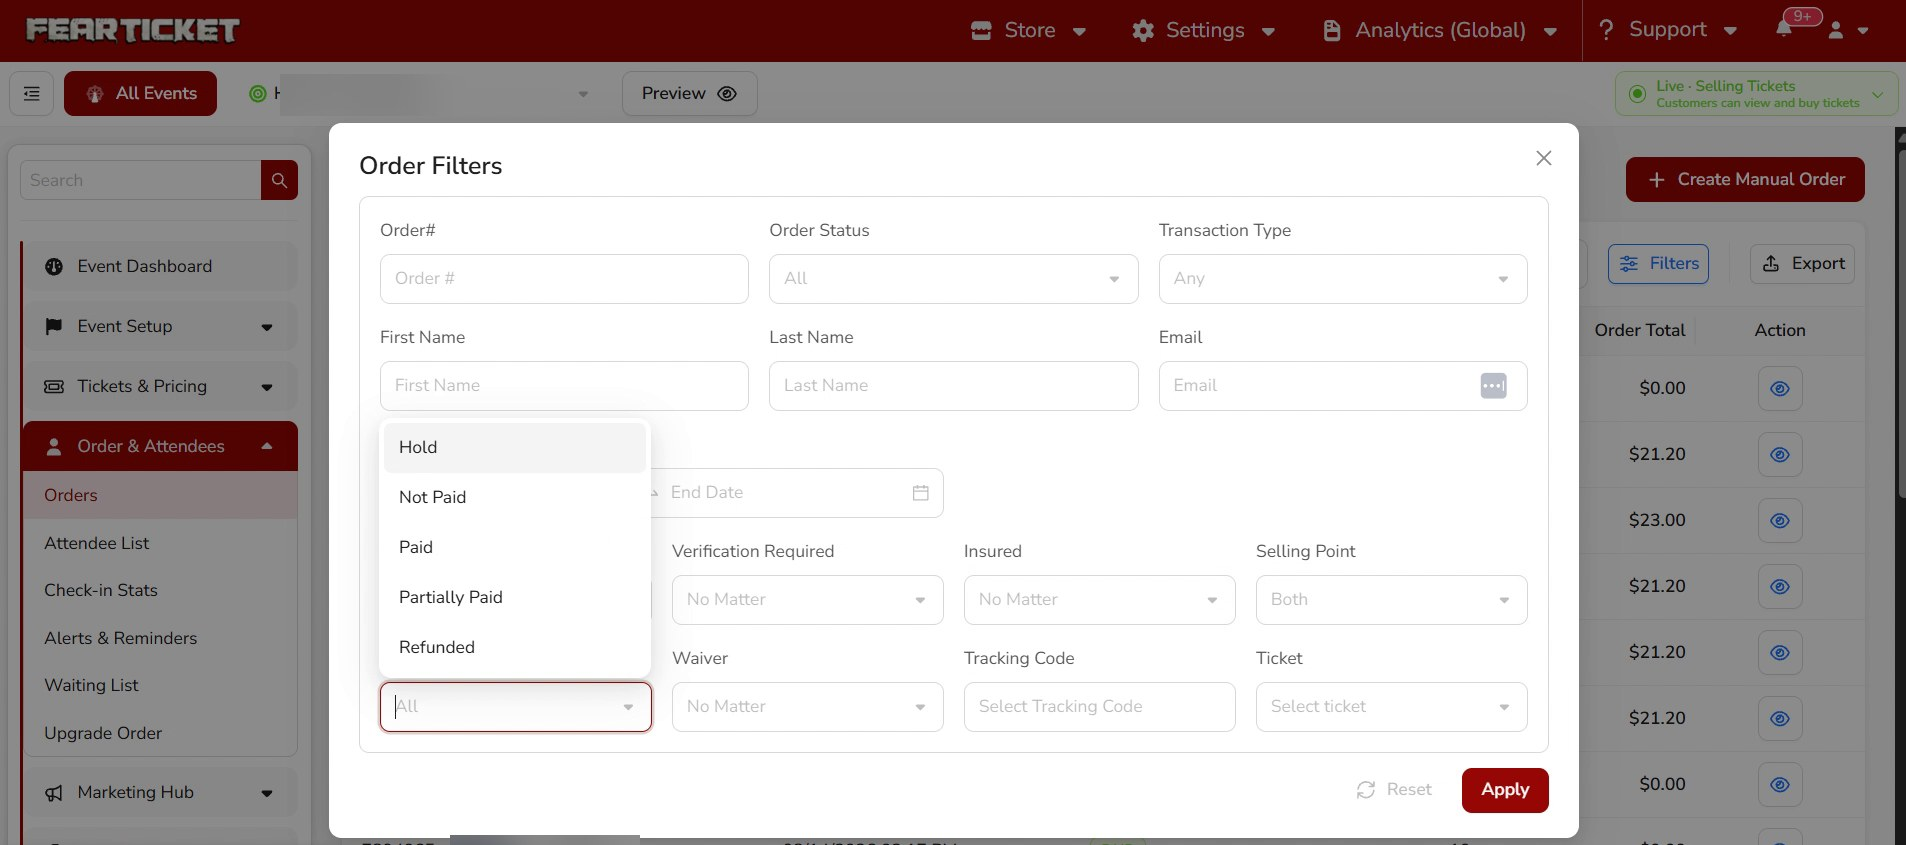
Use the Payment Status dropdown to show only orders that are Hold, Not Paid, Paid, Partially Paid, or Refunded.
Filter by ticket type
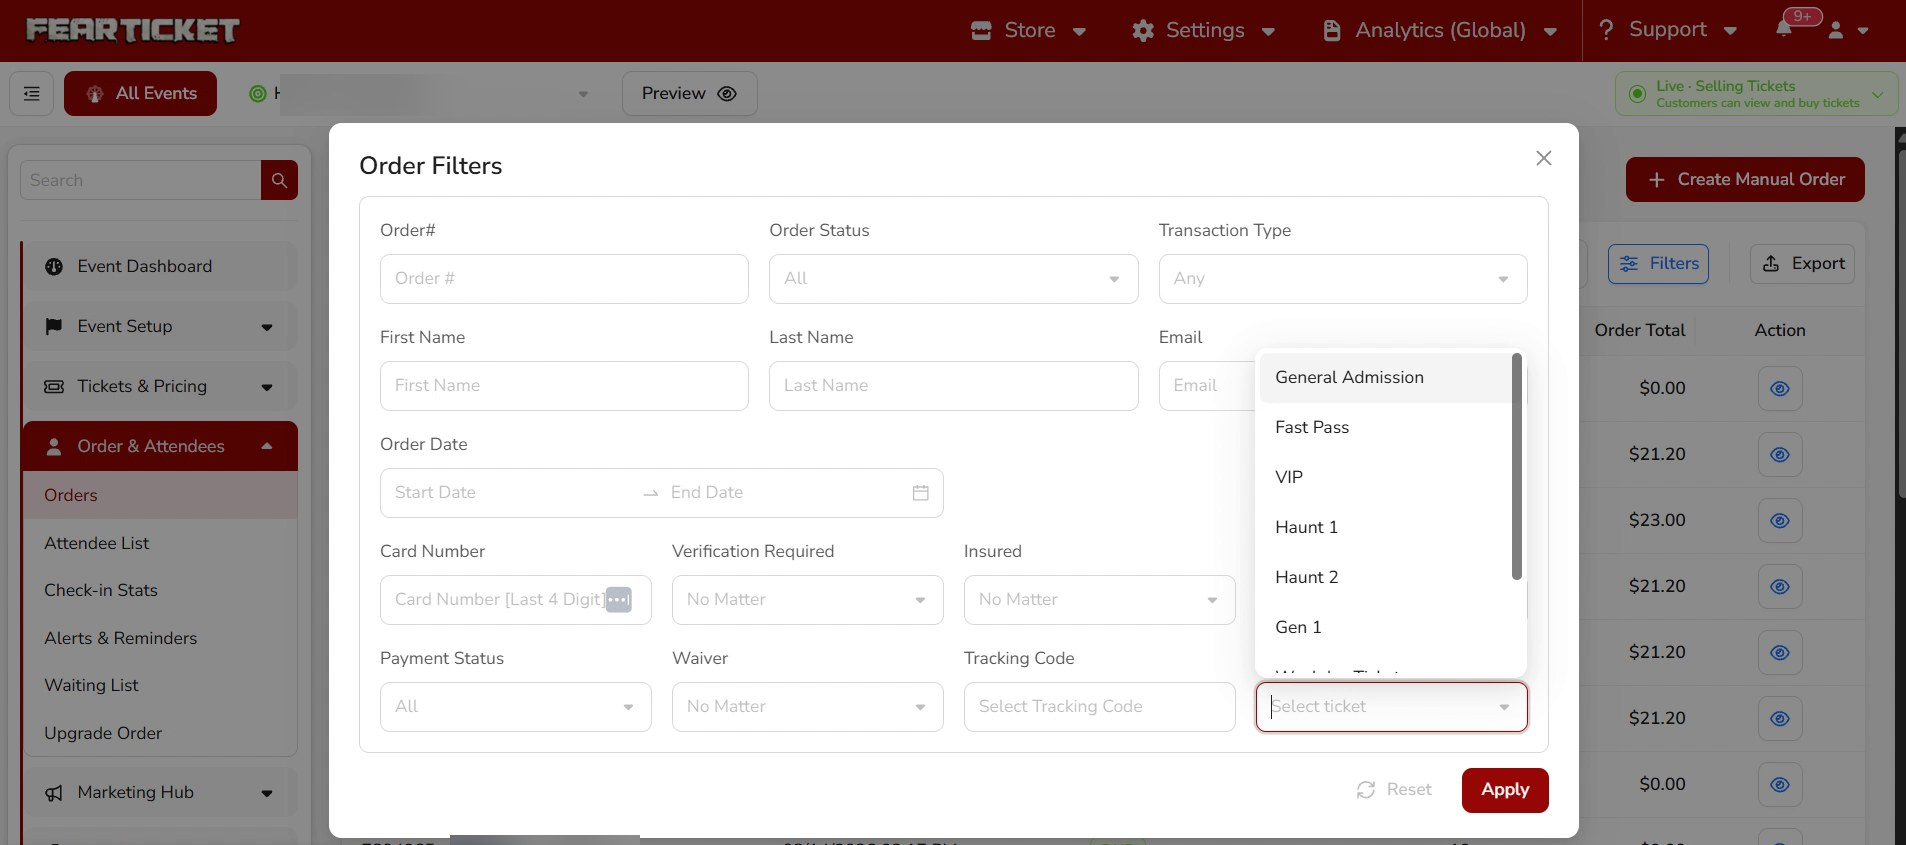
Use the Ticket dropdown to see only orders that include a specific ticket, such as General Admission, Fast Pass, VIP, or any other ticket you've set up.
All filter options
| Filter | Use it to find orders by |
|---|---|
| Order# | A specific order reference number. |
| Order Status | The current status of the order. |
| Transaction Type | The payment method used. |
| First Name / Last Name | The buyer's name. |
| The buyer's email address. | |
| Order Date | A date or date range. |
| Card Number | The last 4 digits of the card used. |
| Verification Required | Whether verification is needed. |
| Insured | Whether the order is insured. |
| Selling Point | Online, box office, or both. |
| Payment Status | Paid, partially paid, refunded, and so on. |
| Waiver | Whether a waiver applies. |
| Tracking Code | A specific tracking code. |
| Ticket | A specific ticket type. |
- Set any combination of the filters above.
- Click
Applyto update the list. To start over, clickReset.
Was this article helpful?
That’s Great!
Thank you for your feedback
Sorry! We couldn't be helpful
Thank you for your feedback
Feedback sent
We appreciate your effort and will try to fix the article