FEARTICKET · Marketing Hub
Affiliate & Sharing lets you create trackable links for each of your marketing channels, so you can see exactly what's converting instead of guessing. Give a partner, an ad, or a social post its own link, and every sale that comes through it is tracked back to that source. You can also lock a link to specific tickets, pre-select a schedule, and set how long the link stays active.
Marketing Hub and click Affiliate & Sharing.What you'll learn
- How to create a new trackable link
- How to tie a link to specific tickets and a schedule
- How to generate a link code and set a validity window
- How to copy the link or grab its QR code
Step 1: Start a new link
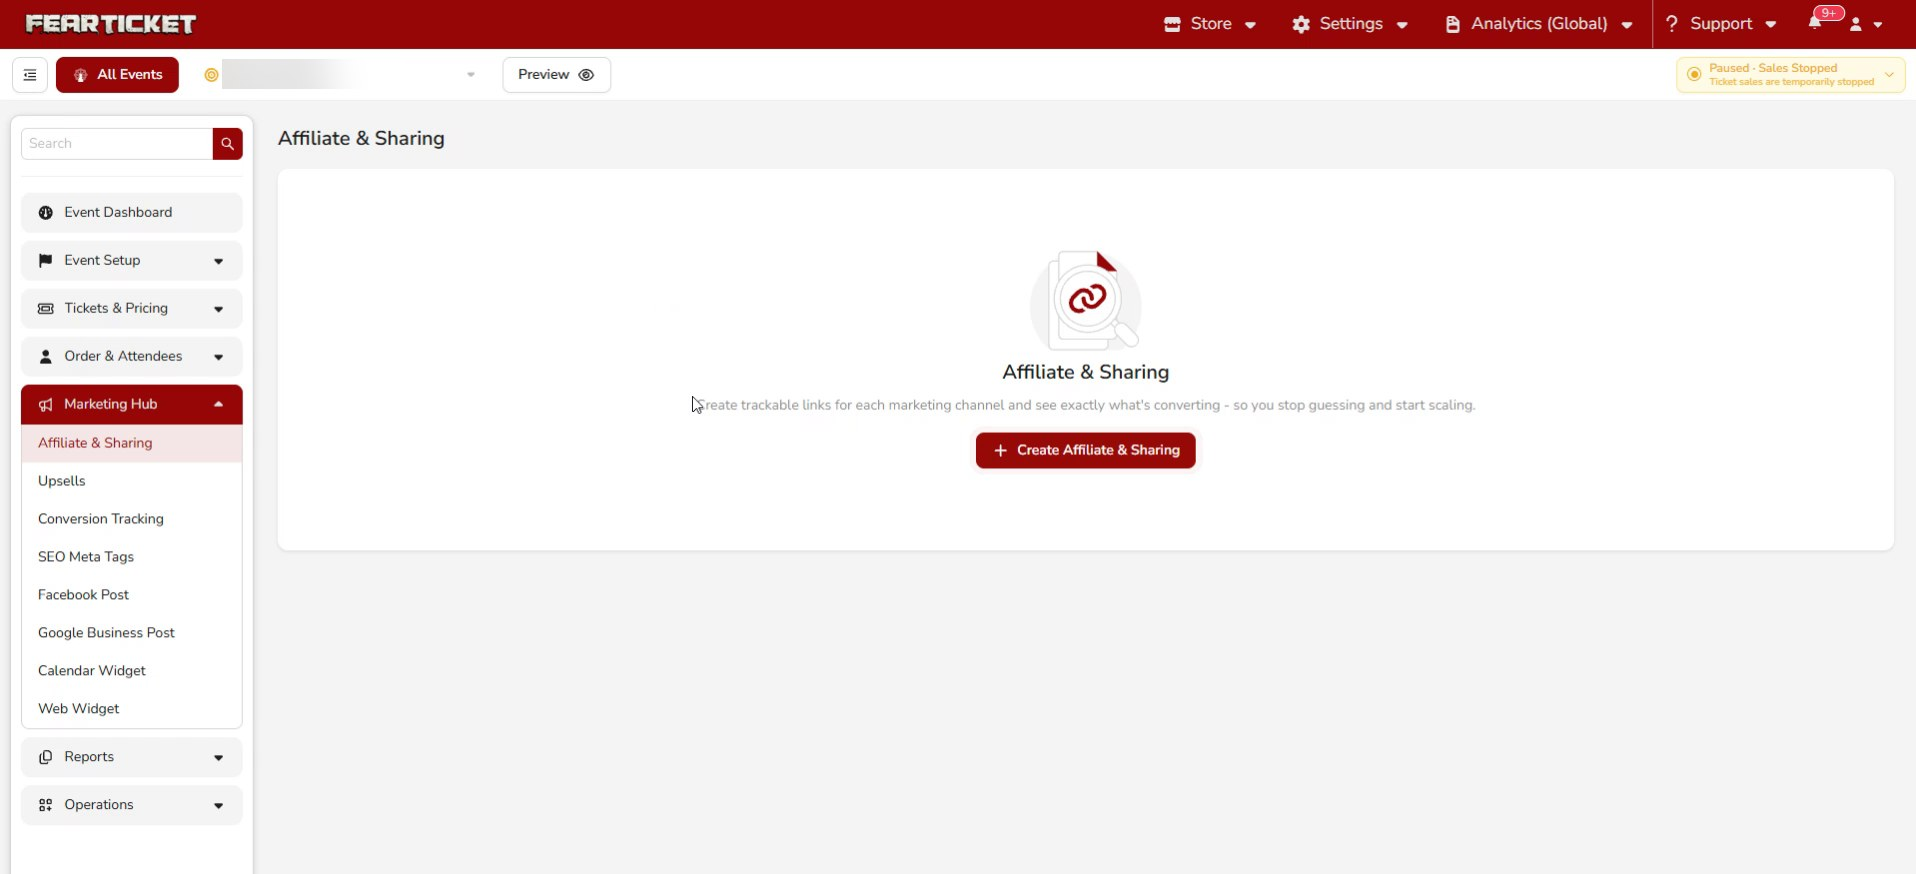
The first time you open the page, no links exist yet. Click Create Affiliate & Sharing to begin.
Step 2: Fill in the link details
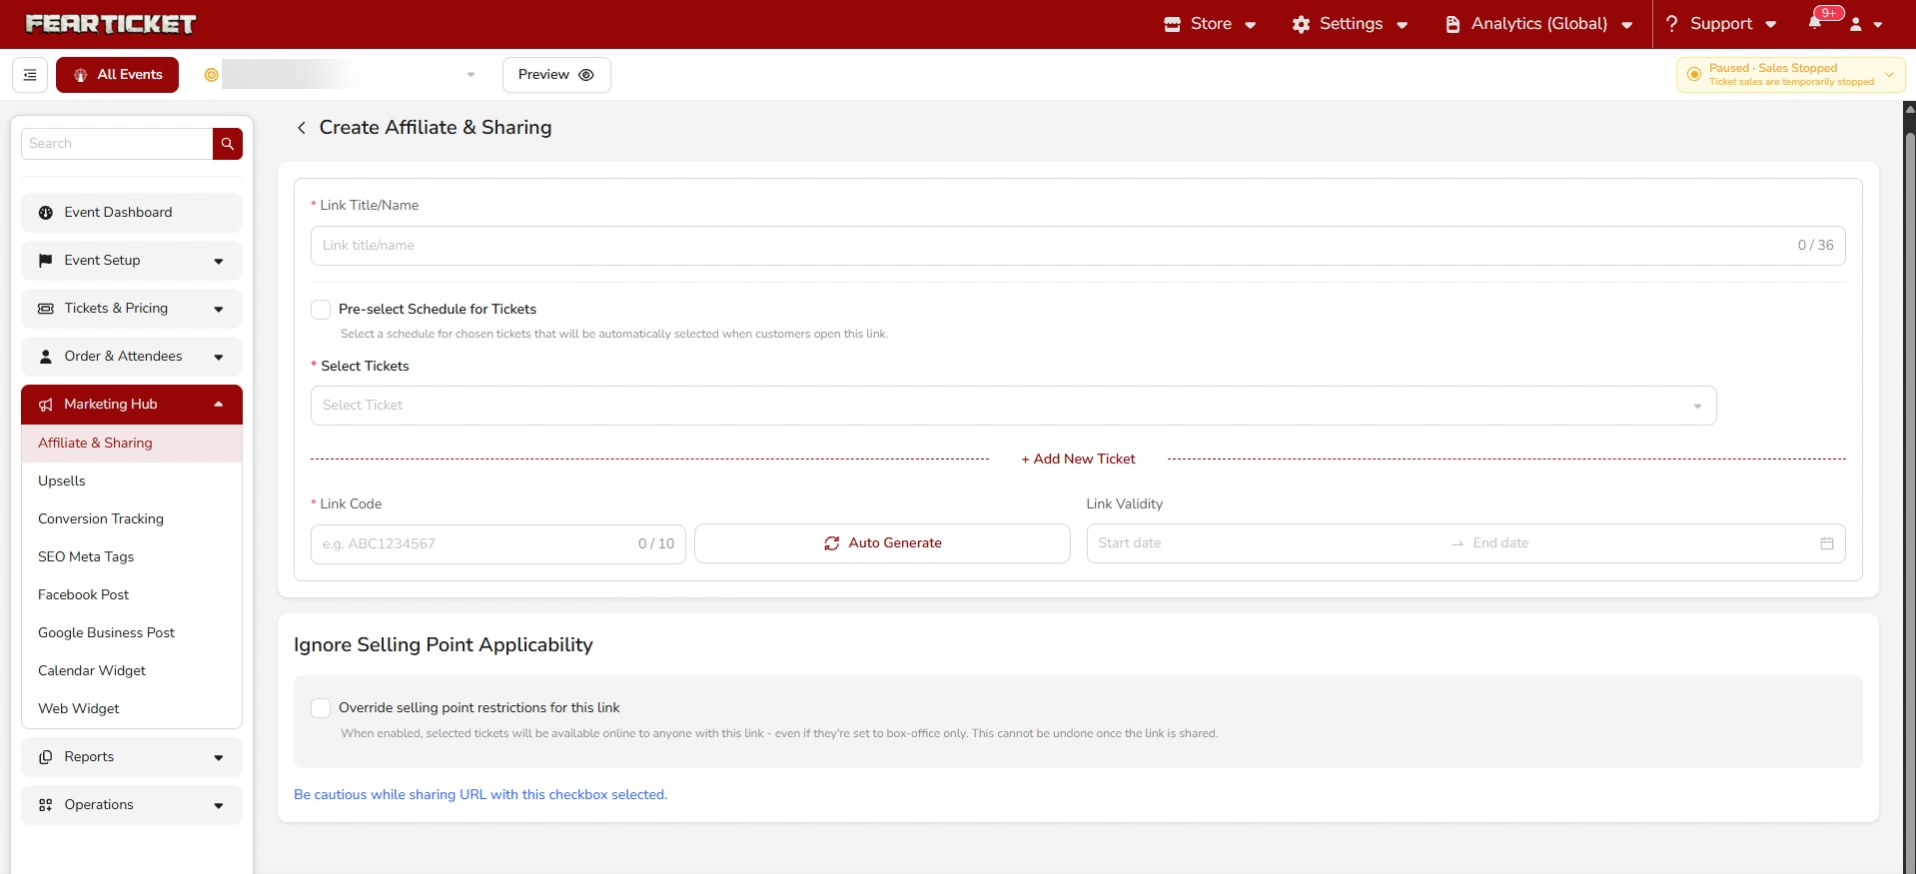
Give the link a Link Title/Name so you can recognize it later, for example the channel or partner it's for.
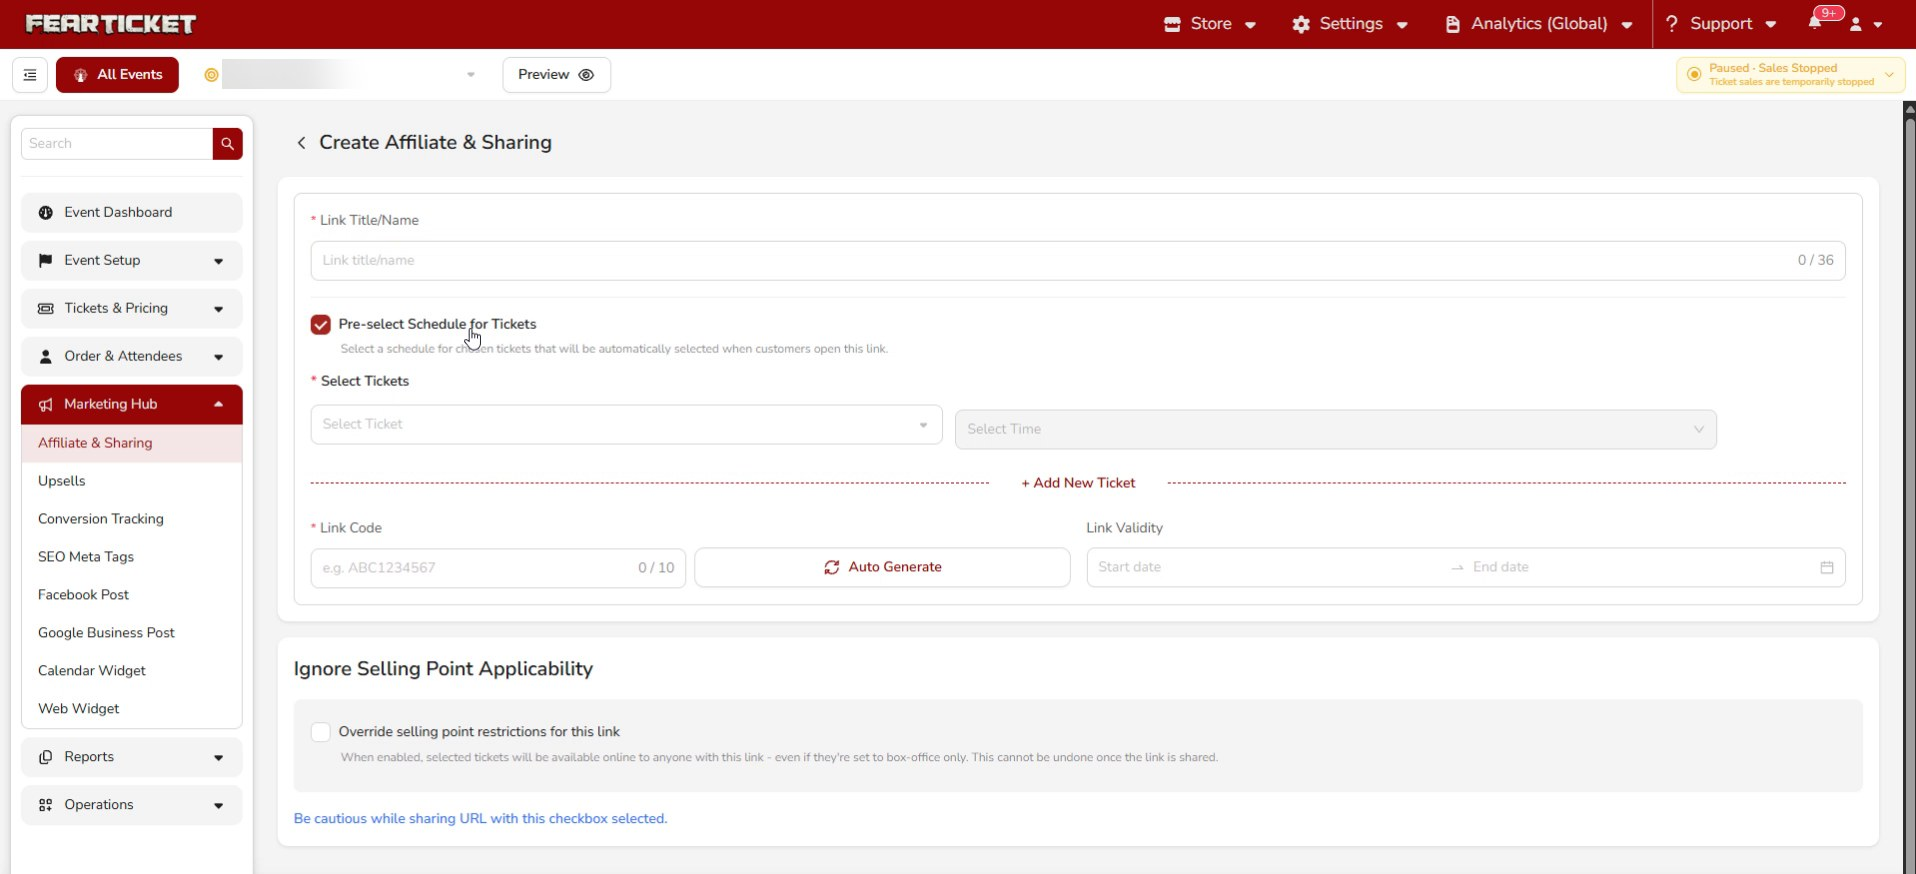
If you check Pre-select Schedule for Tickets, you can choose a schedule and time that will be selected automatically when a customer opens the link. Leave it unchecked if you just want to point customers at specific tickets.
Selecting tickets
Under Select Tickets, choose which tickets this link applies to. Use + Add New Ticket to include more than one. You need to select at least one ticket.
Step 3: Generate the link code
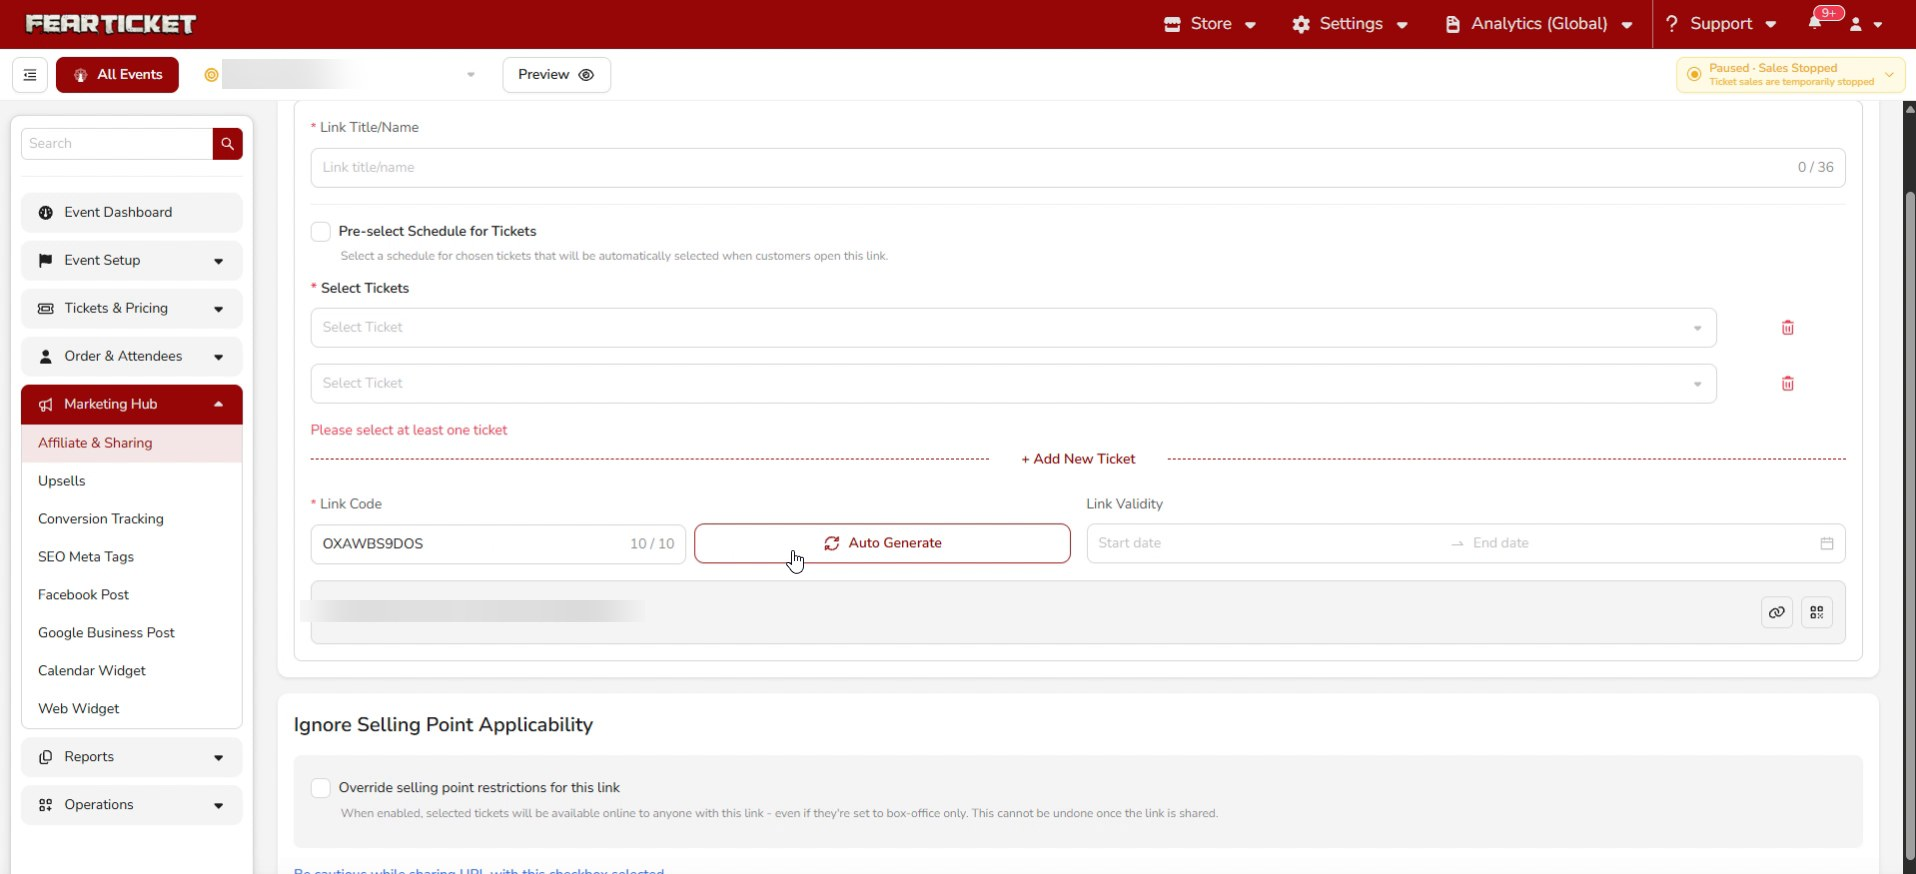
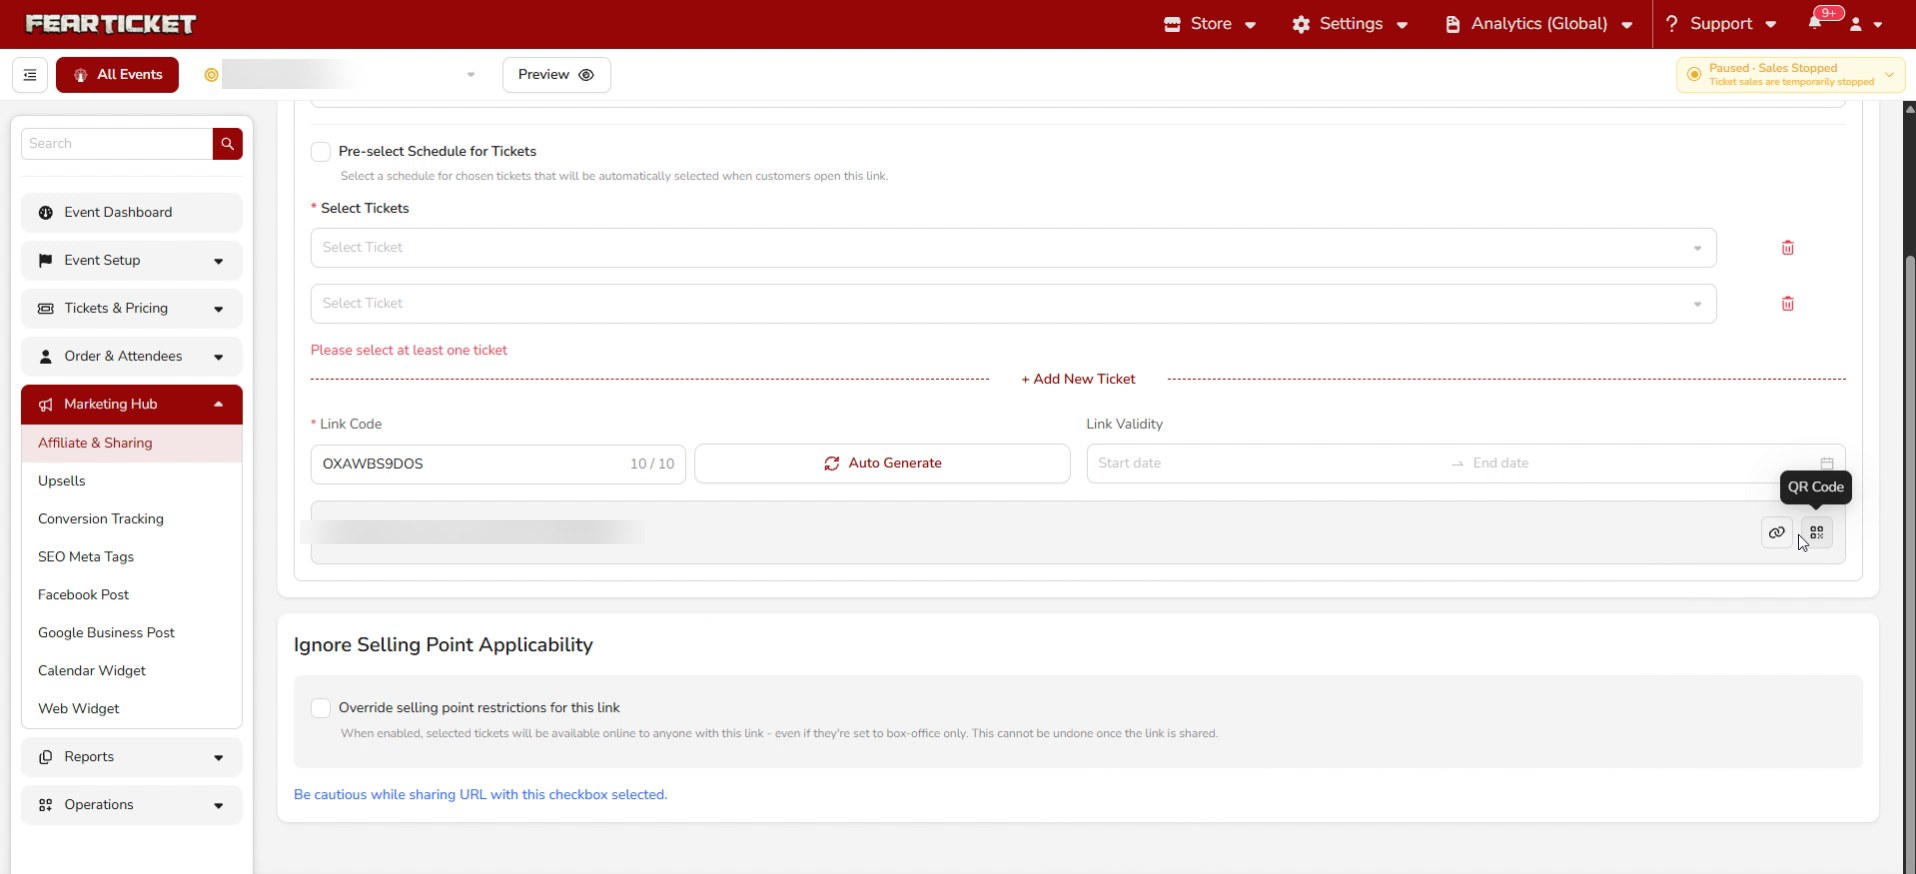
The Link Code is the unique tag added to your URL for tracking. Type your own up to 10 characters, or click Auto Generate to have one created for you. Once set, the full trackable link appears just below.
Step 4: Set link validity (optional)
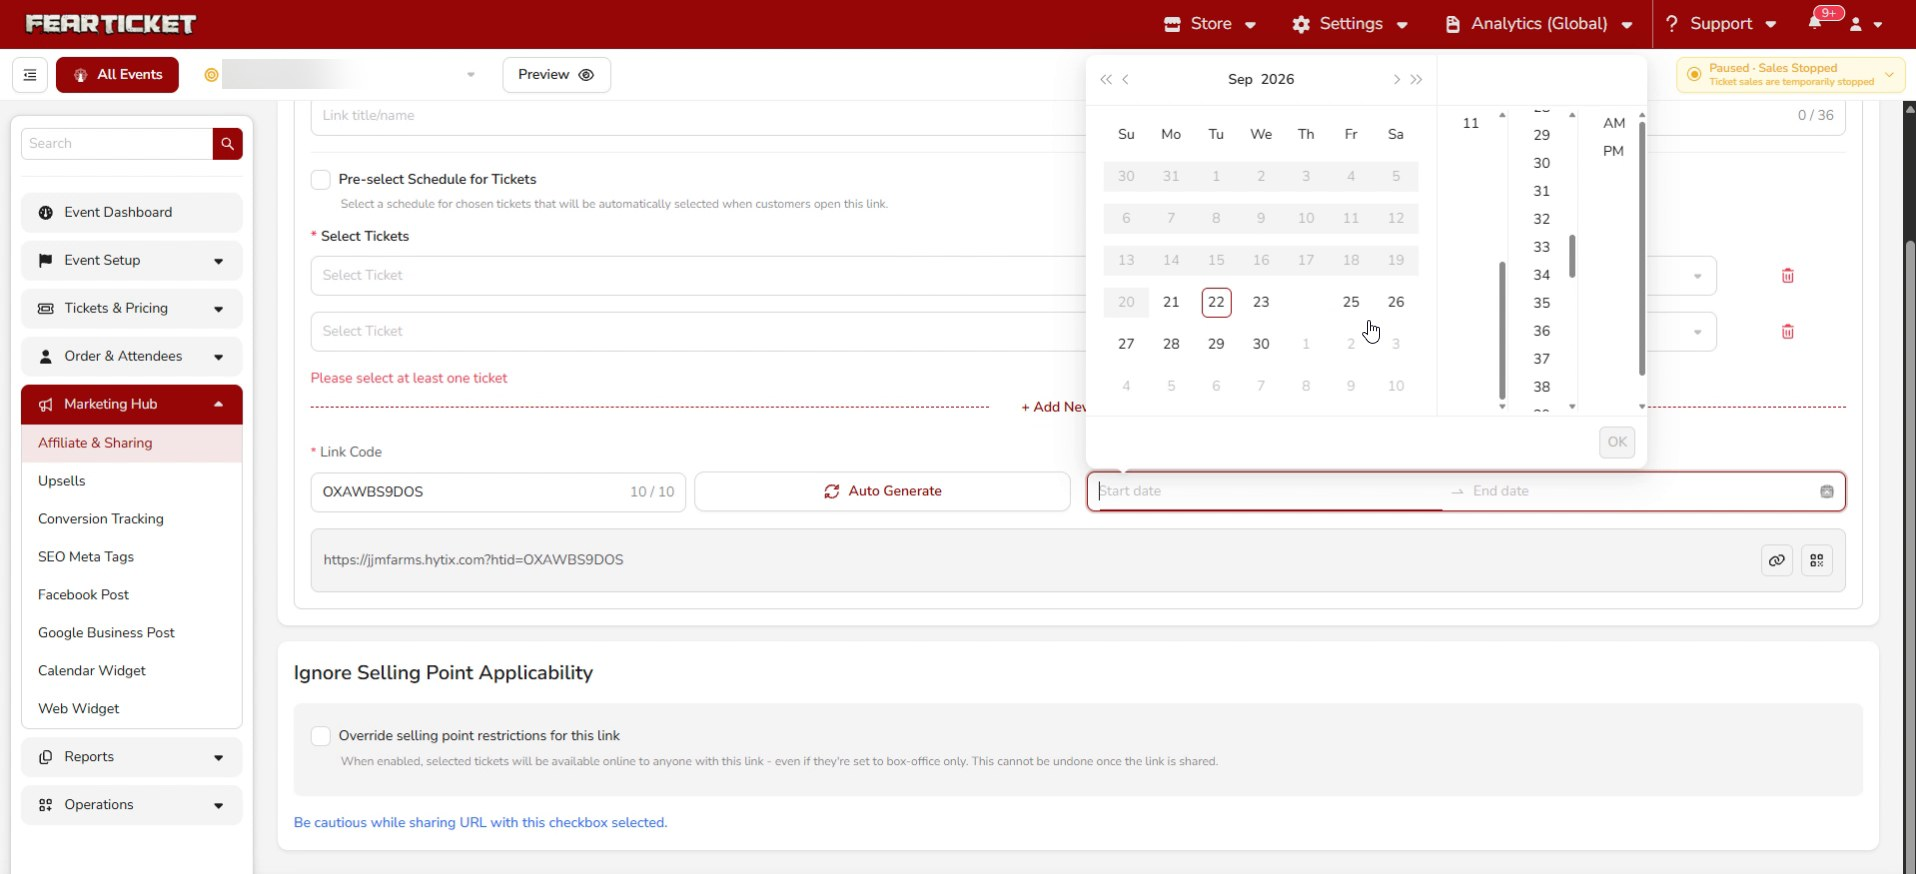
Use Link Validity to control when the link works. Pick a start and end date and time. Leave it blank if you want the link to stay active with no expiry.
\
Step 5: Ignore selling point applicability (optional)
The Override selling point restrictions for this link checkbox makes the selected tickets available online to anyone with the link, even tickets normally set to box office only.
Step 6: Copy the link or QR code
Next to the generated URL, click the link icon to copy it, or the QR code icon to grab a scannable version. Then click Create Link to save it.
Was this article helpful?
That’s Great!
Thank you for your feedback
Sorry! We couldn't be helpful
Thank you for your feedback
Feedback sent
We appreciate your effort and will try to fix the article