Tax Management is where you set up the taxes that apply to your ticket and product sales. Each tax has a name and a rate, and you can add sub-taxes for reference. Once a tax is saved here, it's available to apply across your events, and any change you make updates everywhere that tax is used.
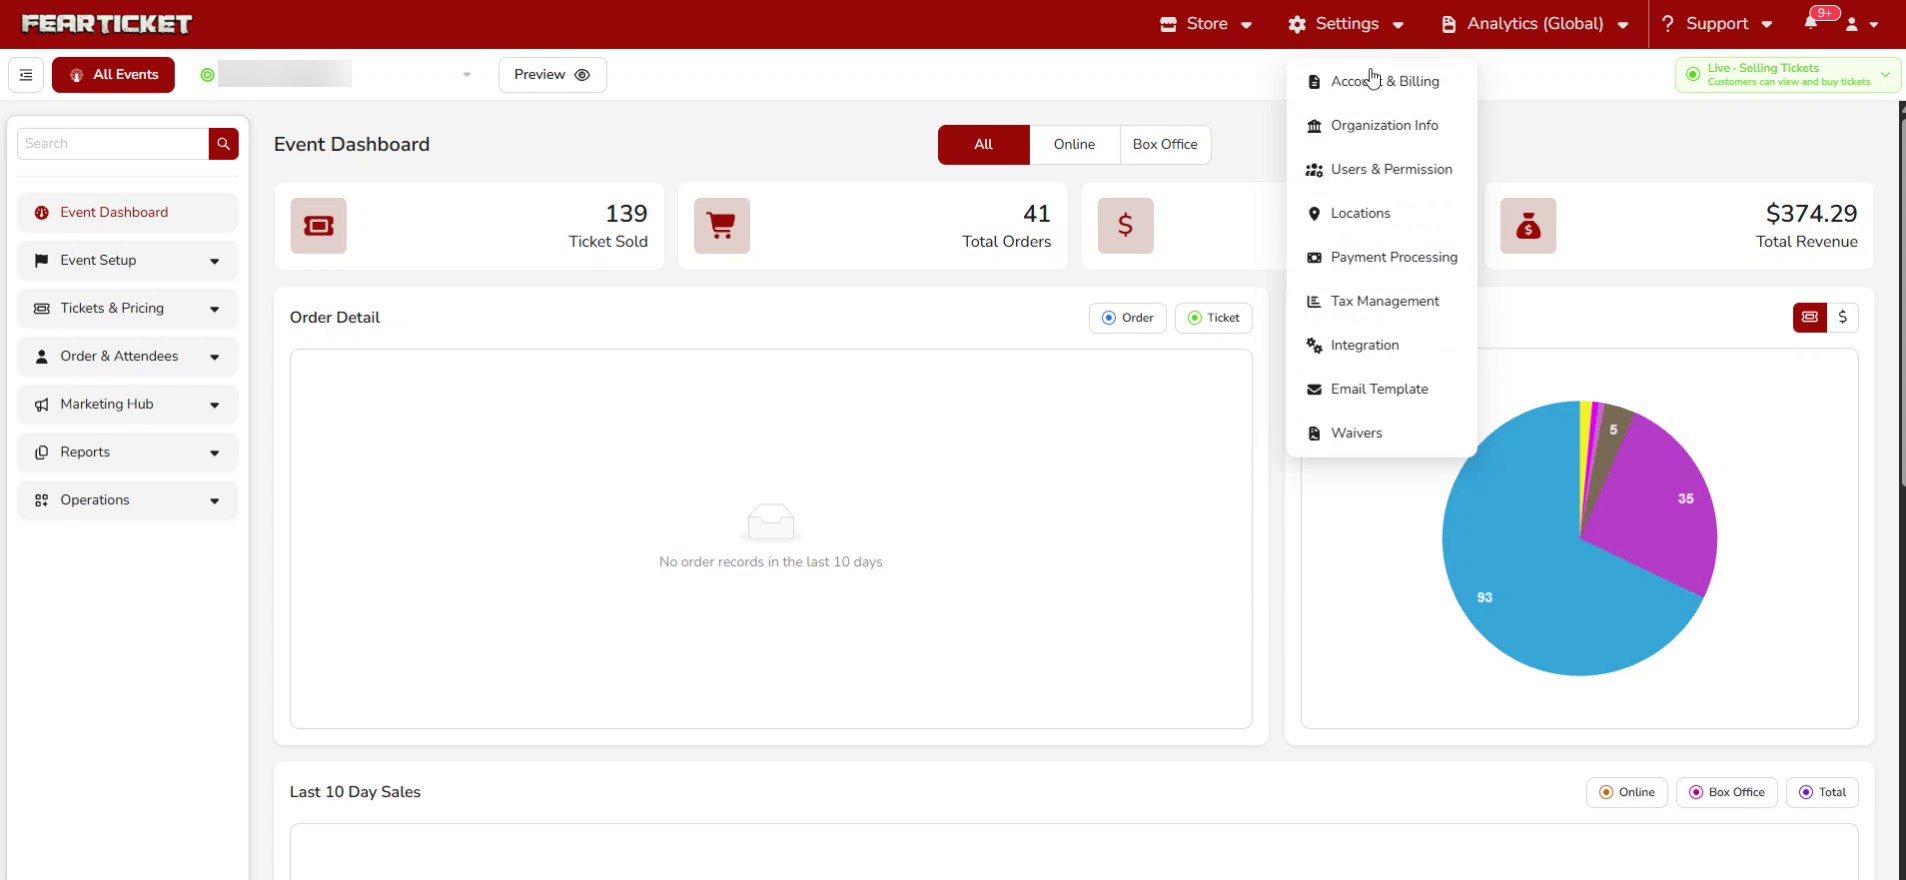
Settings in the top bar and choose Tax Management.What you'll learn
- How to view your existing taxes
- How to create a new tax with sub-taxes
- How to edit or delete a tax
Opening Tax Management
Click Settings in the top navigation and select Tax Management.
The tax list
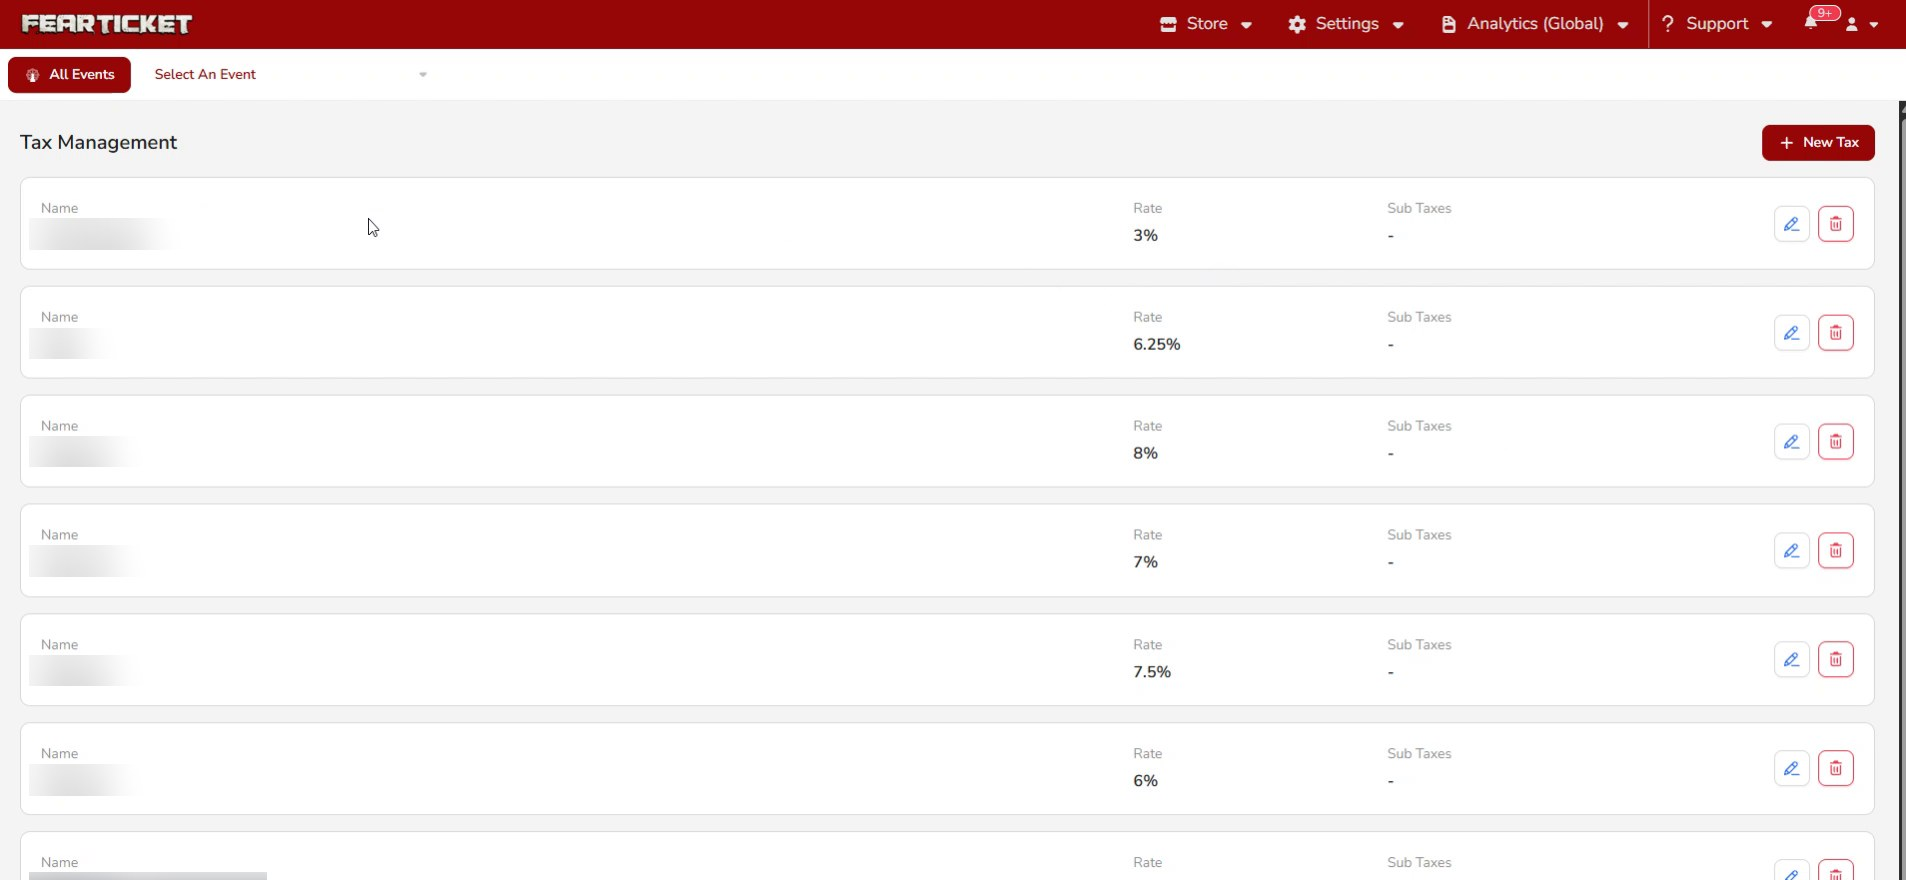
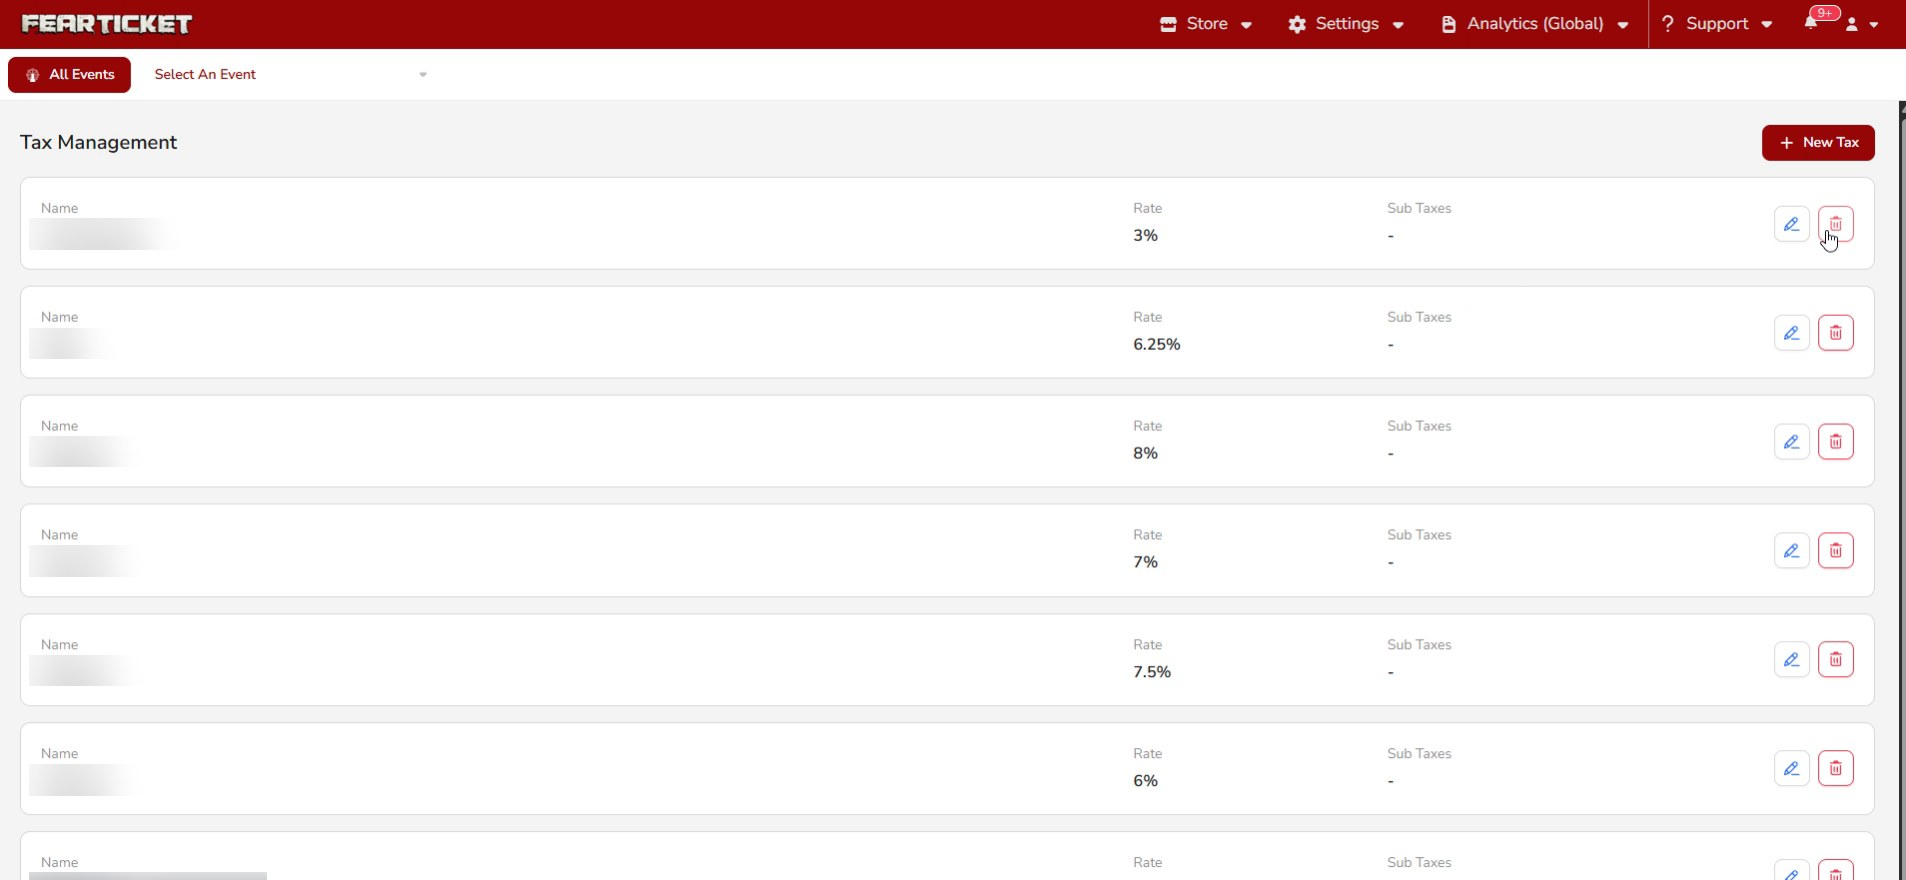
The page lists every tax you've set up, showing its name, rate, and any sub-taxes. Use the edit and delete icons on the right of each row to change or remove a tax.
Creating a new tax
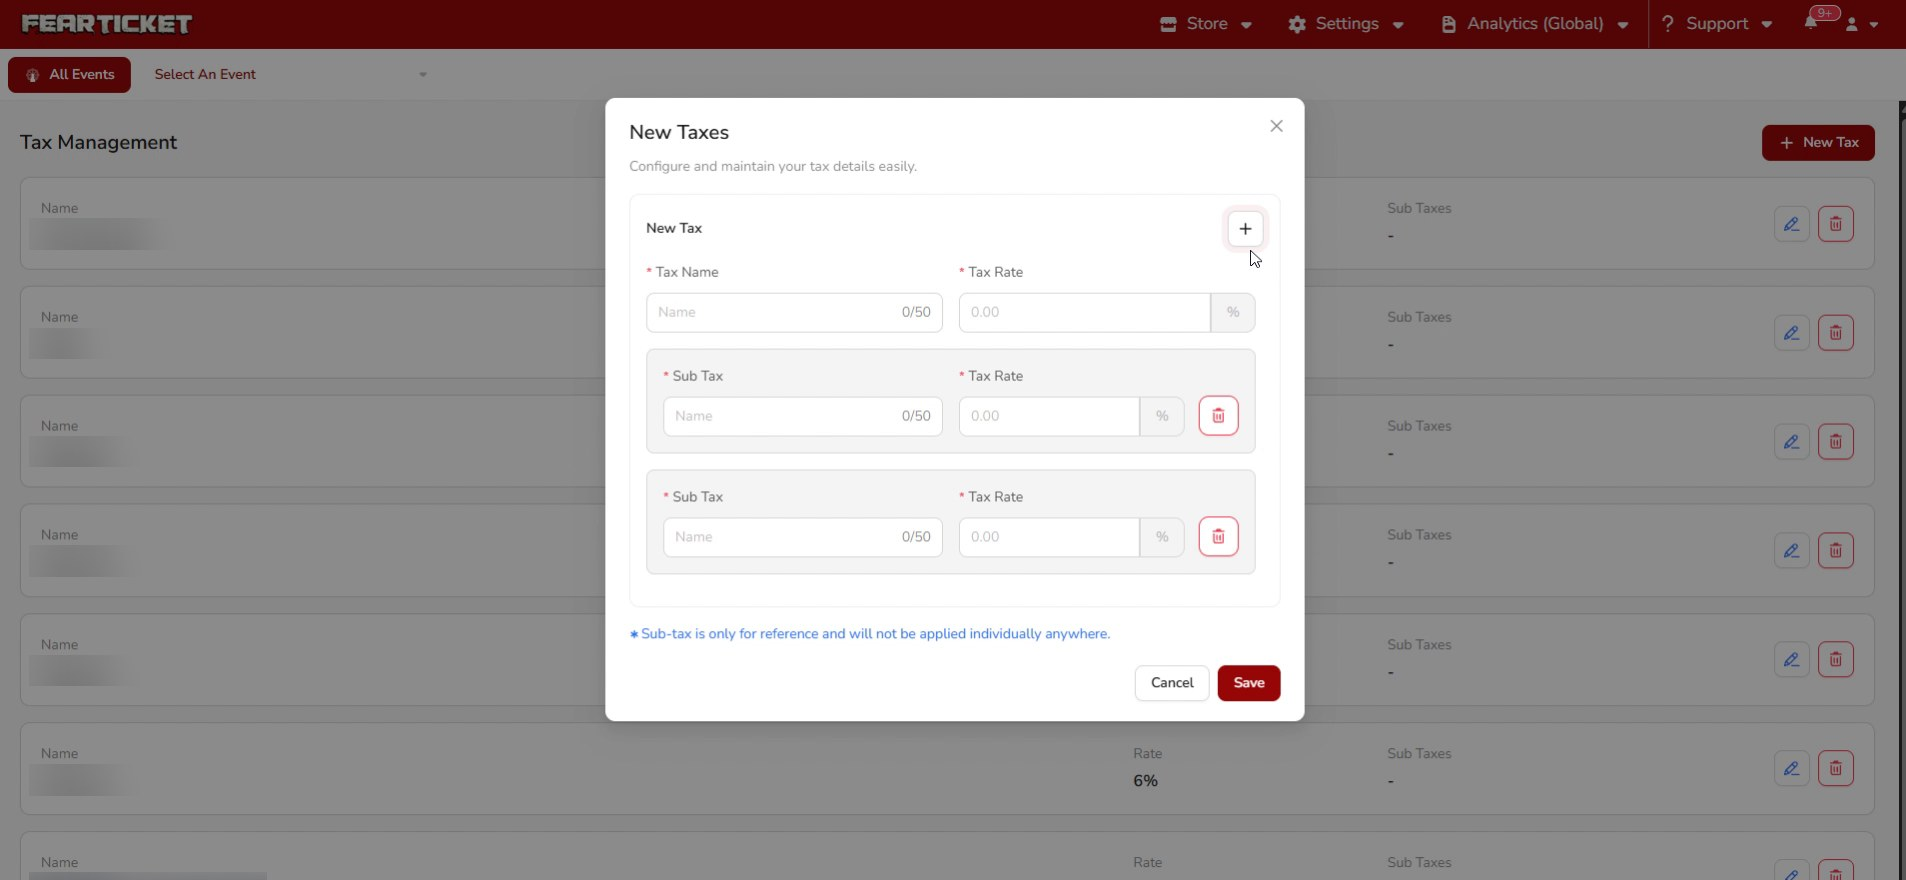
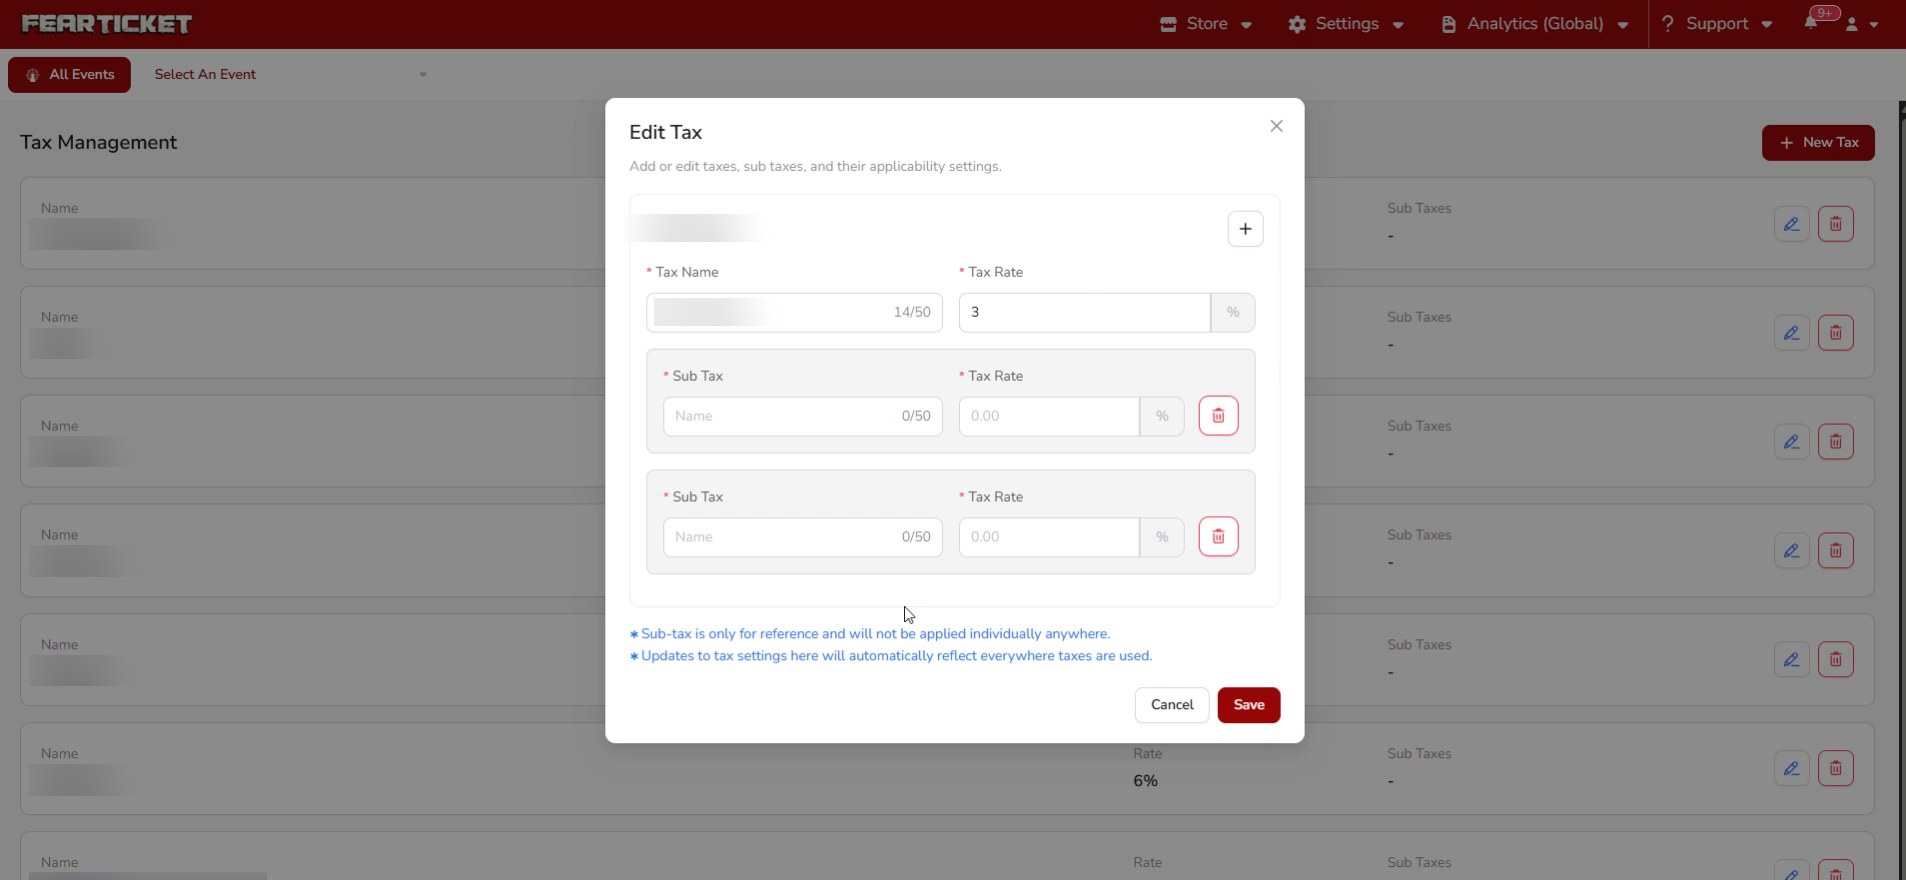
Click New Tax in the top right. In the New Taxes window, enter a Tax Name and a Tax Rate. To add sub-taxes, click the + button and fill in each sub-tax's name and rate. When you're done, click Save.
Editing a tax
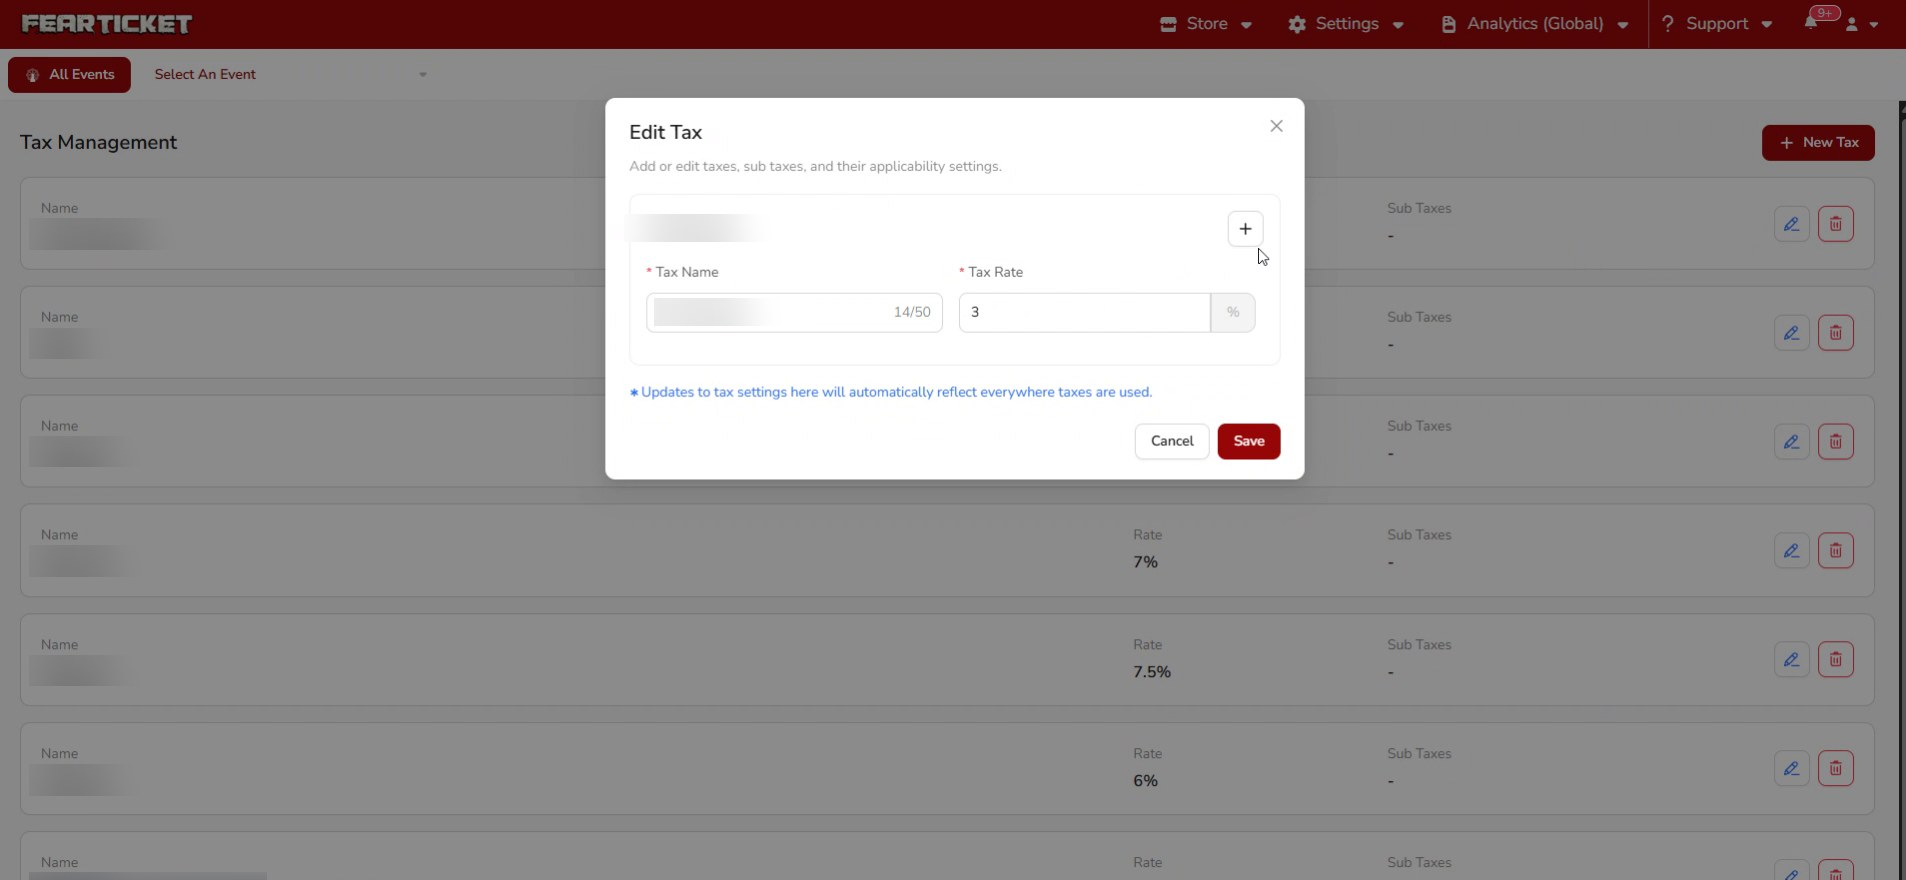
Click the edit icon on a tax row to open the Edit Tax window. Update the name, rate, or sub-taxes, then click Save.
Use the + button to add one or more sub-taxes to the tax, each with its own name and rate. The delete icon next to a sub-tax removes it.
Deleting a tax
To remove a tax, click the red delete icon on its row.
Was this article helpful?
That’s Great!
Thank you for your feedback
Sorry! We couldn't be helpful
Thank you for your feedback
Feedback sent
We appreciate your effort and will try to fix the article